It is very common for writers to share their writing project files with other people. There may be two or more people collaborating on a single project. In those cases, they may share Scrivener files between computers.
Table of Contents
Before we get into ways you can share your Scrivener project files, let me give you a stern warning.
Never allow more than one user to open your project file at the same time. If you do, you could lose recent work. Scrivener files – no matter where or how they are stored – should only ever be open on one device at a time.
Share Scrivener files
The first step in sharing Scrivener files is to determine where the files will be stored.
Every Scrivener user can set her own preferences for where to store project and backup files. Those two locations can – and should – be different.
Ideally, you will store your backup file somewhere that is far removed from your work files.
Note: Scrivener does not always play well with iCloud. It does work well with DropBox. I personally have an iCloud account and a OneDrive account, but I use DropBox to store my Scrivener backups. I save my project work files locally.
Set Scrivener file locations
You’ll set the location for your project files storage and your backups in Scrivener’s Preferences (Mac) or Options (Windows).
Let’s set your work file location first.
Saving Scrivener project files
Whether you work on Windows or Mac computers, to save your work files for the first time, go the File menu and select Save As…. Choose a location.
When you wish to reopen the file, Scrivener should remember where you last saved the file. You should then be able to save your file updates just by selecting File > Save.
You can also use the key commands Command + S on Macs or Control + S on Windows computers.
Saving Scrivener backup files
You will set the location where your backup files are saved in Scrivener > Preferences on Macs or Tools > Options in Windows.
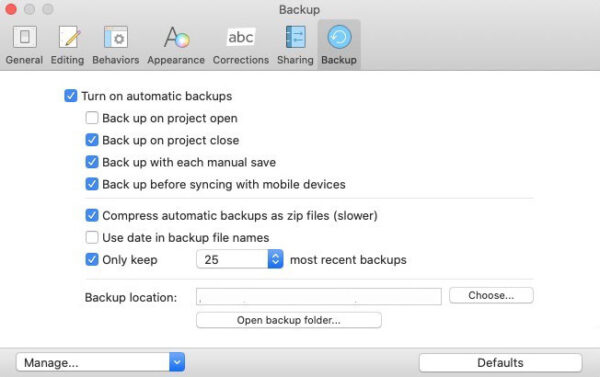
In Scrivener for Macs, go to Scrivener > Preferences. Open the Backup tab. Near the bottom of that window, you will find Backup location:.
In Scrivener for Windows, go to File > Options. Open the Backup tab.
Toward the bottom of the Backup tab, you will see Backup location: Click the Choose: button and browse to the location where you want to store your Scrivener backup files.
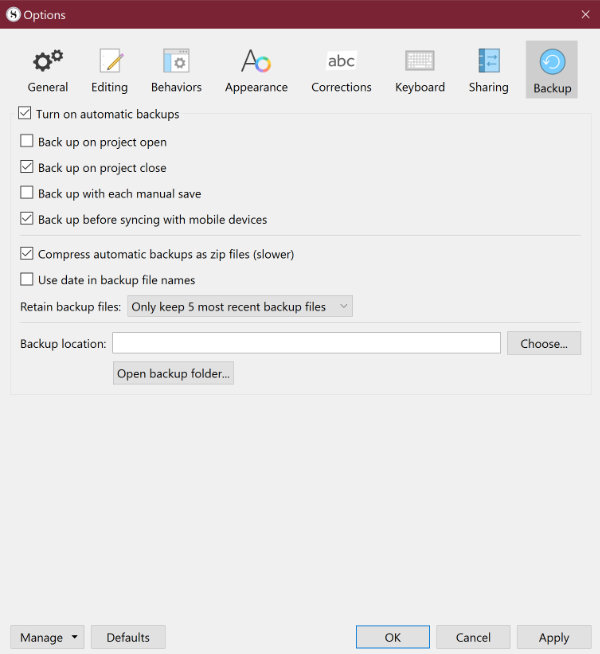
Automatically backup Scrivener projects
At the top of the Backup panel check the box beside Turn on automatic backups to have Scrivener automatically backup your projects. You will need to check other boxes in the Backup panel to tell Scrivener how and when to save your backups.
You can tell Scrivener to back up your project when you open the project, when you close it, or both. I back mine up when I close a project.
The setting immediately above Backup location lets you set how recent backups to keep.
The Open backup folder… button immediately below the Backup location setting takes you straight into the backup folder at your chosen location.
Once you’ve established where you wish to store your Scrivener files, sharing them is as simple as giving those with whom you wish to share your files permission to access them.
You might also find our tutorial, How to Delete a Scrivener Project helpful.
A note about this tutorial. All of our Scrivener tutorials are personally written based on our own experience with Scrivener. If you would enjoy more in-depth training, we recommend Joseph Michael’s Learn Scrivener Fast Course.
You’ll find Scrivener’s official user manuals here.
