Writers who have difficulty staying focused may wish to decrease the disturbances that writing on a computer can present. You may prefer to have a distraction free mode in which to work. Can you reduce distraction in Scrivener? Yes, you can, and there are several tools to help you.
Table of Contents
Reduce distraction in Scrivener – Focus Mode and more
To some writers, a focus mode would be any mode that would reduce distractions and allow the user to stay focused.
Depending on who you ask and which app you are referring to, focus mode can be a setting that allows the specific line or paragraph of the document you are writing to stand out from the rest.
One way of doing that is to cause the current sentence or paragraph to remain normally visible while the rest of the page is faded out, but still slightly visible. Scrivener V3 for Macs has that capability and it is actually called Focus Mode. The feature is not currently available in Scrivener V3 for Windows.
For other users, the ability to highlight the line where the cursor is currently located would be sufficient. Such a feature would cause that entire line to stand out visually.
By another person’s definition, focus mode might be a setting that provides a distraction-free work area which is focused and not littered with buttons and panels that aren’t required for the basic act of writing. Scrivener V3 for Macs and Windows allows you to limit your distractions through its Composition Mode.
Still others might like to have the application menus available, but none of the sidebars, rulers, etc. visible.
Read on for an explanation how to find and use each of the following five features in Scrivener.
- Focus Mode
- Highlight the current line.
- Composition Mode.
- Typewriter scrolling.
- Hide everything but the editor and menu bar.
Although the options are similar in the Editors and in Composition Mode, I’ll discuss them separately. Hopefully, by doing so, we’ll eliminate some possible confusion. When there are differences in the Windows and Mac versions, I’ll let you know.
How to use Focus Mode in Scrivener for Macs
The two main areas in Scrivener where Focus Mode can be activated are the Main Editor and in Composition Mode. However, it can be activated in most areas where editing is possible.
Remember, Focus Mode is currently only available in Scrivener for Macs. The closest thing available in Windows would be the ability to highlight the current line. We’ll look at that option later.
How to turn on Focus Mode in the Editors.
There are two ways to activate Focus Mode in editing areas. The first is via the View menu.
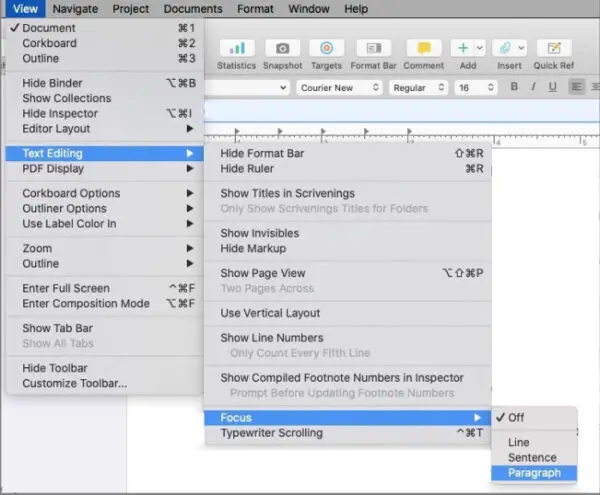
- Go to View > Text Editing > Focus.
- The default setting is Off. Choose Line, Sentence, or Paragraph.
Whichever option you choose, that bit of text will remain plainly visible. The remainder of the document will be significantly faded.
If you choose Line, only the current line will be darker.
If you choose Sentence, the entire current sentence will be darker, even if it wraps to multiple lines.
If you select Paragraph, the entire current paragraph will be darker, no matter its length.
Add the Focus toolbar button in Scrivener.
The second and most convenient way to turn on Focus Mode in Scrivener is to use the Focus button on the toolbar.
The Focus toolbar button is not visible by default, but it can be easily added.
- Go to the View menu > Customize Toolbar….
- A panel with several dozen optional buttons will open. Locate the Focus button and drag it with your mouse or track pad to the toolbar.
- Drop it anywhere in the toolbar.
Bonus tip: Any of the available buttons can be added to the toolbar using the same procedure.
How to use the Focus toolbar button in Scrivener.
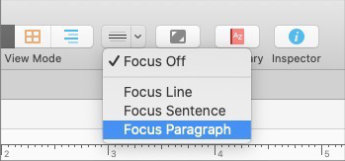
To turn on Focus Mode using the Focus toolbar button, click the small arrow on the right side of the button.
A short list of options will open. Select Line, Sentence, or Paragraph to activate Focus Mode just as you do when you turn on Focus Mode from the View menu.
The same Focus Mode capability is available in Composition Mode. We’ll look at the two together a little later in this article.
How to exit Focus Mode in the Editors.
To turn off Focus Mode in the Editors, simply use the same menu you used to turn it on. Or you can click the Focus toolbar button.
- Select Off from the View menu > Text Editing > Focus.
- Select Focus Off from the Focus toolbar button.
The page should return to normal with all text equally visible.
How to highlight the current line of the Main Editor in Scrivener for Macs and Windows
If I simply want to know where on the screen my cursor is, and therefore where I am typing, I prefer to highlight the current line.
When I do that, the entire line is highlighted with the color of my choice, no matter if I have typed one character or an entire line of text.
Unlike Focus Mode, the ability to highlight the current line is available in Scrivener V3 for Macs and Windows.
Images in this section are taken from the Mac version of Scrivener, but the same settings are available in Windows.
To turn on Highlight current line, go to Scrivener Menu > Preferences in Macs or File > Options in Windows. Then…
- Open the Appearance tab.
- Look down the left column for Main Editor.
- Open the Options tab.
- Check the first item in the Options tab labeled Highlight current line.

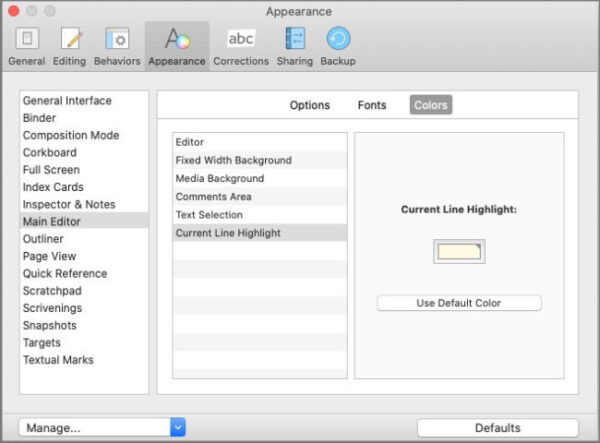
You can change the highlight color if you wish. To change it…
- Stay in Appearance > Main Editor.
- Open the Colors tab.
- The last item in the center column is Highlight Current Line.
- When you select Highlight Current Line from the center column, a small colored box will appear in the right column.
- Click that small box and choose your color from the color picker.
What is Composition Mode in Scrivener?
Composition Mode in Scrivener is what people might call focus mode when they are referring to a writing environment with no menus, side panels, or other screen distractions. The idea is to have a working environment with as few distractions as possible.
The creators of Scrivener designed Composition Mode in such a way that writers can type with no onscreen disturbances. Yet, features such as the Binder, Inspector, text styling, word count, and more are easily accessible.
How to turn on Composition Mode in Scrivener for Macs and Windows
You can use any of the following methods to activate Scrivener’s Composition Mode.
- Click the Compose button in the toolbar.
- Go to the View menu and select Enter Composition Mode.
- Use F11 in Windows or Option + Command + F on Macs
How to turn on Focus Mode inside Composition Mode.
Scrivener’s Focus Mode can be used in Composition Mode just as it can in other editors.
To turn on Focus Mode in the Composition Mode window, move your mouse or trackpad to the bottom of the screen.
A full-width bar should pop up. Click Focus (the sixth setting from the left). From there you can choose…
- Focus Line
- Focus Sentence
- Focus Paragraph
As with Focus Mode in the Main Editor, the onscreen text will be faded except the line, sentence, or paragraph that you are currently working on.
How to highlight the current line in Composition Mode in Scrivener for Macs and Windows
The process of highlighting the current line in Composition Mode is similar to the way we did it in the Main Editor. For your convenience, I’ll repeat the process here with the differences.
To turn on Highlight current line, go to Scrivener Menu > Preferences in Macs or File > Options in Windows.
- Open the Appearance tab.
- In the left column, select Composition Mode.
- Open the Options tab.
- Check the first item, labeled Highlight current line.
In Scrivener for Windows, the Highlight Current Line in Composition Mode borrows the setting you made for Highlight Current Line in the Main Editor. The highlight color you chose for the Main Editor will also be used in Composition Mode.
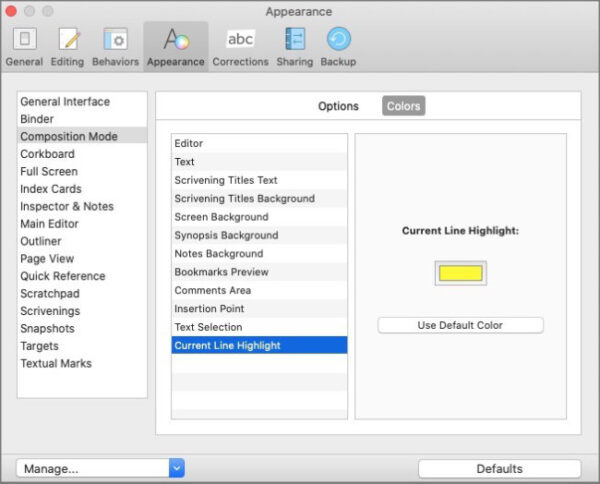
To change the highlight color for Composition Mode in Scrivener for Macs, stay in Appearance > Composition Mode.
- Open the Colors tab.
- The last item in the center column is Highlight Current Line.
- Click the small colored box in the right column to choose your color from the color picker.
Typewriter Scrolling in Composition Mode – Scrivener for Macs and Windows
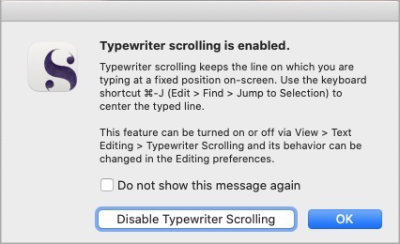
Typewriter scrolling is a feature in Scrivener that causes the line you are typing on to be stationary rather than moving down the page until it reaches the bottom as would normally happen.
The Windows version and the Mac version of Scrivener have typewriter scrolling in the Main Editor, Composition Mode, and Quick Reference panes. However, the Mac version has more setting options than the Windows version.
Both versions allow you to turn typewriter scrolling on using keyboard shortcuts.
- In Scrivener for Windows, Windows key + Control + T toggles typewriter scrolling on and off.
- In Scrivener for Macs, toggle typewriter scrolling on and off with Control + Command + T.
In Composition Mode, hover at the bottom of the window until the hide-away toolbar appears. Click the Typewriter button to toggle typewriter scrolling on or off.
You can also turn it on via the menus at View > Text Editing > Typewriter Scrolling.
In Scrivener for Windows, typewriter scrolling will cause the line you are typing to be in the vertical middle of the window. At the time of this writing, that position cannot be changed.
In Scrivener for Macs, typewriter scrolling is more versatile. When you first turn it on, by default the active line will be moved to the vertical middle of the screen. However, if you click somewhere else in the page while typewriter scrolling is active, the typewriter line will move to that location.
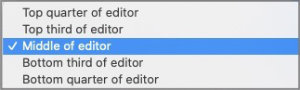
The Mac version of Scrivener also allows you to move that scroll line to one of five different locations. They are…
- Top quarter of editor
- Top third of editor
- Middle of editor
- Bottom third of editor
- Bottom quarter of editor
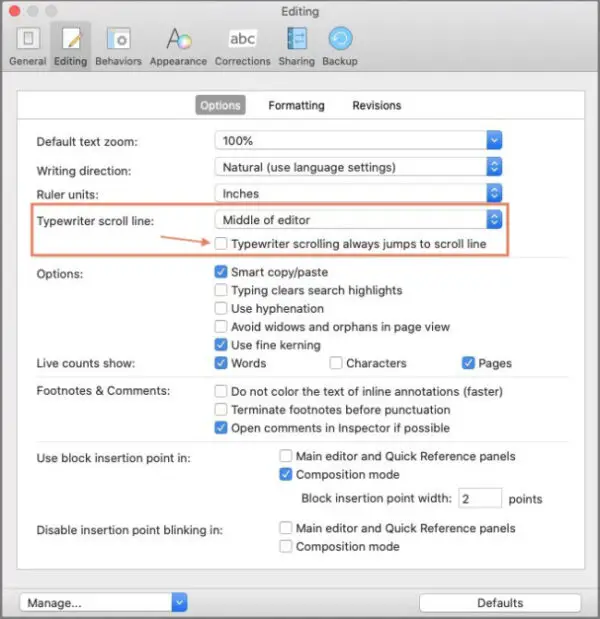
You can tell Scrivener (for Macs only) that you want the scroll line to be stationary. To do that…
- Open settings at Scrivener > Preferences > Editing.
- Open the Options tab.
- The fourth setting down is labeled Typewriter Scroll Line. Just below that setting, check the box labeled Typewriter scrolling always jumps to scroll line.
If you find that the scroll has moved away from where you want it, you can tell it to return to its default place by using Command + J or via the menu at Edit > Find > Jump to Selection.
Additional settings for Scrivener’s Composition Mode.
In addition to the features we’ve already looked at, Composition Mode in Scrivener provides easy access to many other features while still maintaining an uncluttered environment for writing.
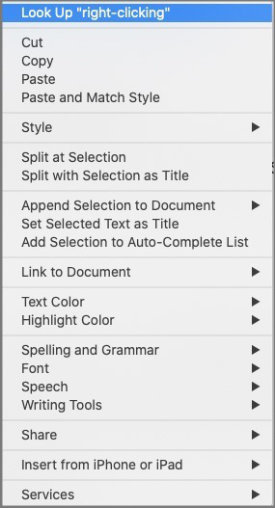
For starters, there is a context menu that provides a long list of available text-related items just by right-clicking.
Most of the Composition Mode settings are hidden in the hide-away bar at the bottom of the window. Depending on the resolution of your computer’s display, there may be a large gap between the buttons on the left end and those on the right end of the bar. For that reason, I’ll discuss the hide-away bar in two parts – left and right.
Hover over the bottom bar as you did setting up Focus mode and typewriter scrolling.

From the left, the first setting is Text Scale. I use this setting every time I use Composition Mode. It allows me to make the text as large as I like without changing the text size in any other editor. Options range from 50% to 800%.
If none of the existing settings suites your needs, you can click Custom at the bottom of the list. A box will open at the top of the window where you can enter your own preferred setting.
The second setting is labeled Paper Position. By default there is no background, but if you have an image that fills your entire screen set as a backdrop behind the Composition Mode editor, you can use the Paper Position setting to move the editing window (your paper) left or right until it is located exactly where you want it in relation to the background image. Learn to add a background image in Composition Mode.
The third setting is labeled Paper Width. Move the slider left to narrow the writing area. Move it right to widen it.
The next button opens a floating version of the Inspector panel which is normally attached to the right side of the window. One Inspector tab will be open at a time. To change Inspector tabs, click the small up/down arrows in the top right corner.
To the right of the Inspector button is the Go To button. When you click the Go To button, you’ll see a miniature version of the Binder where you can easily open any other file that is part of the current project.
The next two buttons are Focus and Typewriter, which we’ve already discussed.
The last button on the left side of the bar is labeled Keywords. This button opens the Keywords panel of the Inspector in its own floating pane. You can also see the same pane in the Inspector panel by selecting it from the Inspector panel’s top right menu.
On the right end of the bottom bar there are two controls. The first one is labeled Paper Fade. Slide the control to the left to make your Paper (your editor) more transparent. Slide toward the right to make it less transparent. This control is handy for creating a little artistic touch in which you can see your backdrop image through the Paper, or editor panel.

The last button on the right is the Exit Composition Mode button that I mentioned earlier. Click it to exit Composition Mode.
Finally, in the center of the bottom bar between the left and right sets of controls, you’ll see a number which is your document’s word count. If you click on the word count itself, a small panel will open with a lot of additional information.
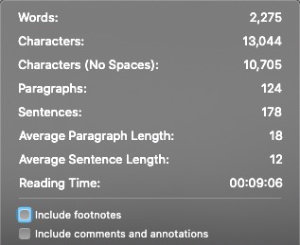
When you click the word count, you’ll see counts for…
- Words
- Characters
- Characters (no spaces)
- Paragraphs
- Sentences
- Average Paragraph Length
- Average Sentence Length
- Reading Time
Below those counts are two more settings that you can check to include more information. They are…
- Include footnotes
- Include comments and annotations
By default, those settings are unchecked.
How to exit Composition Mode in Scrivener
Exiting Scrivener’s Composition Mode is quick and easy using any of the following methods.
- Use the Escape key.
- Use F11 in Windows or Option + Command + F on Macs.
- Click the Exit Composition Mode button in the bottom bar. It is the last button on the right.
How to hide everything in Scrivener
If you’d prefer a different approach to creating a distraction-free layout in Scrivener, you can always hide everything except the editor.
The following can be set to hidden from the View menu.
- Binder (View > Hide Binder)
- Inspector (View > Hide Inspector)
- Toolbar (View > Hide Toolbar)
- Tab Bar (View > Hide Tab Bar)
- Editing Format bar (View > Text Editing > Hide Format Bar)
- Ruler (View > Text Editing > Hide Ruler)
- Editor Header (View > Editor Layout > Hide Editor Header)
- Editor Footer (View > Editor Layout > Hide Editor Footer)
With all of those items hidden, you are left with nothing but the Editor panel and the menu bar at the top.
To reverse them so that all or part of the items are visible, just go to the same menu locations. The menus will say Show Binder (Inspector, etc.) instead of Hide. Click Show (item) and it will return to the state you began with.
Distraction free writing in Scrivener
In this article I’ve shown you just a few ways that Scrivener can be adjusted to help you stay focused on your writing and to create a writing environment that is free from unnecessary clutter. It’s just another example of Scrivener’s versatility.
You can find official downloadable Scrivener User Manuals for Windows and Mac here.
A note about this tutorial. All of our Scrivener tutorials are personally written based on our own experience with Scrivener. If you would enjoy more in-depth training, we recommend Joseph Michael’s Learn Scrivener Fast Course.
