During the process of formatting a book for print or eBooks, there are several reasons you might want to insert a page break. In this article I’ll show you how to insert a page break in Vellum.
Table of Contents
First, let’s look at ways to use page breaks to customize your book’s formatting.
When to insert and use a page break in Vellum
You might find a page break useful when you want to include any of the following on its own page in your book.
- A quotation.
- A few lines of verse.
- An image such as a map.
How to insert a page break in Vellum
There are two ways to insert page breaks in Vellum. You can use either of the following methods.
You can insert page breaks before or after Text Features and paragraphs. You cannot insert a page break inside a paragraph.
Method one to insert page breaks in Vellum
Before you start: Please ensure that your copy of Vellum is up to date. This tutorial is based on Vellum 3.0.4 which was the latest version available at the time this tutorial was written. If your version is older than 2.8, you won’t have the same capabilities.
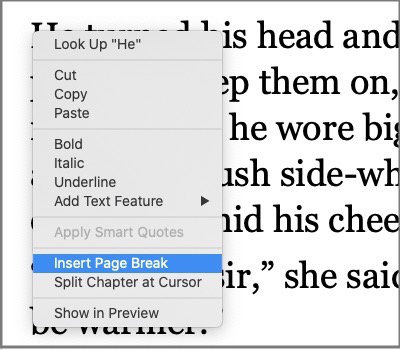
- In the Text Editor panel, place your cursor where you want the page break.
- Right click inside the page and choose Insert Page Break from the context menu. If you don’t see Insert Page Break, use the Control key while you right click.
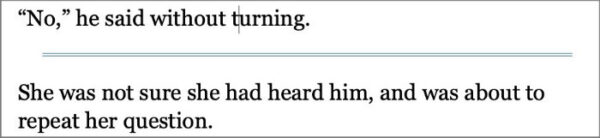
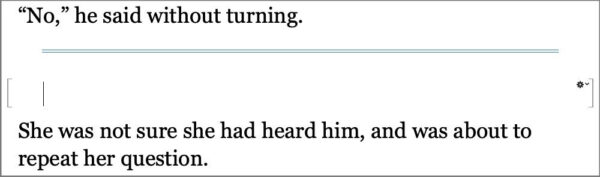
- You should see a double blue line in the Text Editor indicating where the page break is.
Method two to insert page breaks in Vellum
In the Text Editor panel, place your cursor where you want the page break.
- Go to the Chapter menu.
- Select Insert Page Break.
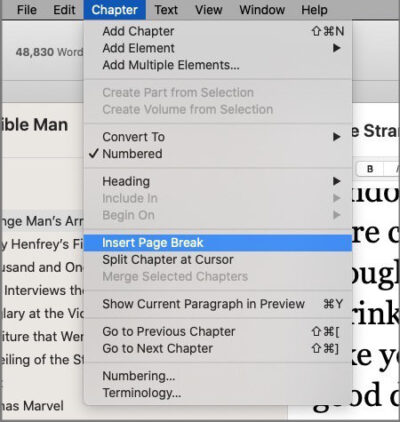
- Just as with the first method, a double blue line will appear marking the page break.
Insert a quotation on a page of its own in Vellum
To place a quote on its own page in Vellum, you’d first insert the page break where you want the quote to appear.
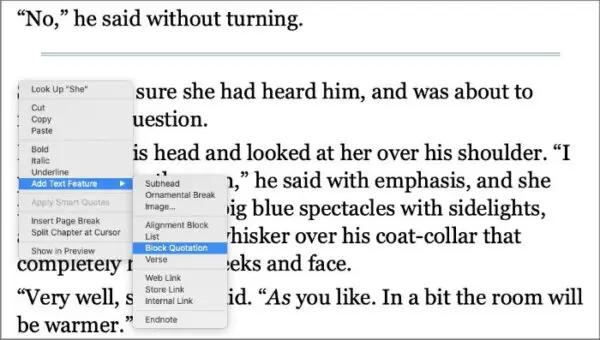
- With your mouse, right click after the page break.
- Mouse over Text Feature.
- Choose Block Quotation.
- You should have a Block Quotation inserted and ready for you to add your quoted text and formatting.
You’ll need to add another page break just after the Block Quotation if you want the quotation on a page by itself. To do that, just repeat the process of inserting a page break using either of the methods outlined above.
Insert a poem on its own page in Vellum
You might have a poem on a page by itself instead of a quotation.
Follow the same process you just used to insert a Block Quotation, but this time after you insert the first Page Break, choose Verse from the Text Feature menu instead of Block Quotation.
Insert a photo on a page by itself in Vellum
Vellum allows you to insert an image of any size on a page by itself up to the dimensions of a single page. In this exercise, we’ll look at inserting a full-page image inside a chapter.
One way to insert full page images in Vellum is to use the Full Page Image element. The Full Page Image element allows images to be inserted with a full bleed (no page margins).
That process works very well for inserting an image between parts or chapters in a book. You can use it to insert a cover image for your title page in Vellum.
You will not be able to use the Full Page Image element to insert images inside chapters. That is because an Element in Vellum can be inserted between chapters or other elements, but not within a chapter.
For example, if you write historical fiction and you want to have an image of a castle between parts of your book, you can do that using the Full Page Image element.
But if you wanted to insert that map in the middle of a chapter, you’d use a Text Feature.
The decision whether to use a Page Break or not depends on the size of the image.
If the image that you want to have on its own page is considerably smaller than a full page image, you should use the same method we’ve used so far.
Note that images inserted as a Text Feature will have margins and cannot be set with a full bleed as the Full Page Element allows.
To insert an image on its own page inside a chapter you’ll follow the process you used earlier to create a Page Break.
You can drag the image into your chapter. Or you can insert it using the right click menu.
- Right click and mouse over Text Feature.
- Click Image….
- A Finder window will open for you to locate your image.
- Click Choose.
If you aren’t a fan of right clicking, you can insert the image from the Text menu.
- Under the Text menu, mouse over Add Feature.
- Click Image….
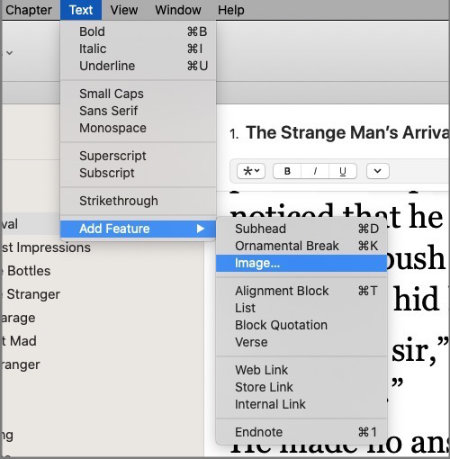
- Locate your image.
- Click Choose.
With the image inserted, you’ll see a small version of the image inline in your page. A circle with three dots will be in front of the image.
Click in that circle to open an image settings panel. Beside the Size label, you’ll see four small rectangular icons arranged from smallest to largest.
Those icons determine how large the image will be on your page.
The first two will work for any size image. If you click on the third or fourth icon, you’ll see a checkbox added below the four sizing icons that is labeled On Separate Page.

If you are using either of the two largest image sizes and you check that box, your image can be inserted on a page by itself without the use of page breaks.
You can use the page break method or you can simply insert the image and check the On Separate Page box to have that image displayed on a page by itself.
If you prefer to use the page break method, just leave the box beside On Separate Page unchecked.
How to remove a page break in Vellum
You may discover that you’ve inserted your page break in the wrong place. After looking over the final result, you may decide that you’d rather not have that quotation or image there.
If that happens it’s very easy to remove the page break that you created. Just locate you cursor just past the newly inserted page break and hit the Delete key.
If instead, you want to test the layout with and without the page break, you can experiment with cutting the page break rather than immediately deleting it.
You can cut the page break by holding the Command key while you hit the X key. You can also right click the selected page break and choose Cut.
Cutting the page break will hold it in your computer’s memory temporarily. If you see immediately that you want to keep it, just hold down the Command key and hit V. The page break will reappear.
The page break will only be held in memory until you copy something else. If you find that you’ve permanently deleted it, just go back through the steps of inserting a page break.
A final note about page breaks in Vellum
Page breaks in Vellum work in print and in eBooks on most devices. They may not work as intended on Kobo eInk and desktop or in Google Play books. On those devices there will still be a break, but it will be treated as a scene break which does not force a new page.
You can more information about Elements and Text Features in Vellum’s official documentation.
