Scrivener is a very popular app that helps writers of all types to be more productive. In this article, we’ll look at how to indent in Scrivener.
Table of Contents
How to Indent in Scrivener
When I write first drafts in Scrivener, I write with the Editor set up to emulate a double-spaced sheet of typing paper with a mono-spaced font like Courier New. I set my indents and tabs manually. Call me old-fashioned, but I quite like the feeling of typing a manuscript on 8 1/2 X 11 paper.
However, I’m quick to admit that I do not miss having to retype sections or even entire pages just to correct a missing or misspelled word or two. Those of you who have no memory of a pre-computer existence may not know what I’m referring to.
How to indent in the Scrivener Editor
The first place we’ll look for indention settings is in the Editor. You’ll want to be sure you have the Format bar and the Ruler enabled.
Both can be enabled by going to the View menu, then Text Editing > Show Format Bar and Show Ruler.
The Format Bar allows you to set your font and font size, as well as other settings you’re accustomed to seeing in MS Word such as bold, underline, lists, etc..
The Ruler is what allows you to indent paragraphs in the current document. It works in a way that is similar to the ruler in Word.
From the left end of the Ruler you’ll see a small downward pointing arrow on Macs or an upward pointing arrow in Windows. Drag that across to change the left margin. Moving to the right, you’ll see small arrows pointing to the right.
Those represent tab stops and can be added to by clicking anywhere along the ruler and relocated by dragging them left or right across the Ruler. Delete one by dragging it completely off the Editor.
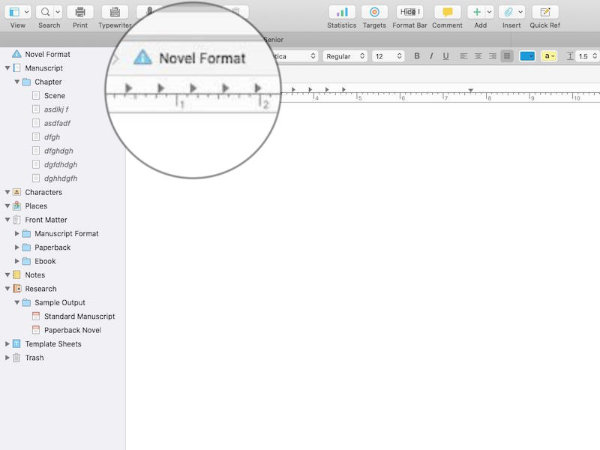
The magical little gizmo that allows you to change the paragraph indent sits just above the margin and/or tab stops. You may see it all the way to the left or inset a few spaces. It is a T-shaped marker in Scrivener for Macs and a small downward pointing arrow in Scrivener for Windows.
If it is atop the left margin, your paragraphs will start on a new line, but they will not be indented.
Click in your document where you want indented paragraphs to begin. If you drag the indent marker in a few spaces, new paragraphs will start on a new line, but indented according to that setting.
Become familiar with the Ruler because it is used in every place that allows you to set indents.
That indent tool works great for times when you are in a rough draft and want your paragraphs to be indented. You may want your headings left-aligned, but not styled like Scrivener styles them.
Let’s say you want a heading between parts of your document. You can type your heading text and select it, or place your cursor at the beginning of a paragraph where you will type your heading and choose H1 or H2 from the styles drop-down in the Format bar. That will automatically style that text in bold and aligned to the left margin.
If you don’t want the text to be bold or coded as an H1 or H2 heading, you can simply place your cursor at the beginning of the line and drag the indent marker in the Ruler to the left margin.
That will give you a left aligned heading without bold and without heading tags automatically attached. Like any other text, you can select the intended text and change its size, font, and color to suit your needs. The end result would be a customized heading.
Note: You should be aware that headings without H1 or H2 styles attached to them will not show up in Microsoft Word as headings if you were to compile your Scrivener document to a .docx. If that is your intent, you’ll be better off using proper H1 or H2 styles.
If you manually align headings to the left, you will need to move the indent marker back where it was for the following paragraphs to be indented.
Setting indents for the current project only
If you wish, you can set your editor settings for the current project. Doing so allows you to set margins, tabs, font, font size, etc. for the project you’re working on without changing the default settings that apply to new projects.
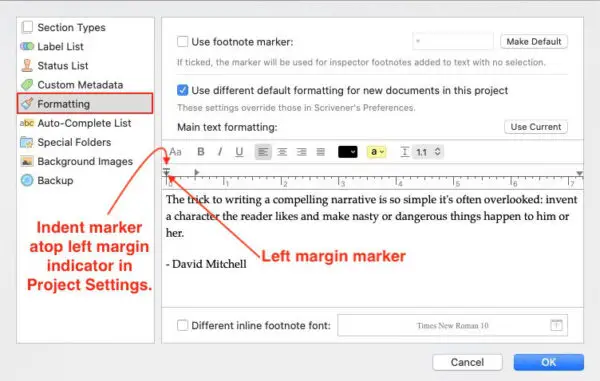
To change the settings for the current project, select Project in the top menu. Then select Project Settings. There are several categories of settings available in the Project Settings panel. To find the settings that we’re interested in, look in the left side column and click the Formatting tab.
In the panel on the right, tick the second checkbox. That activates the settings just below. If you check that box, whatever settings you make in the editor settings below it will be used on all new documents in the current project. Otherwise, the default global settings will be used.
To set the desired indents, the same “T” marker that exists in the document editor (toward the left end of the ruler) sets the paragraph indent.
Setting an indent as a default for all new projects
If you want to change the default settings so that all future projects will use your desired settings, go to Scrivener > Preferences on a Mac or File > Options on Windows computers. In the Preferences/Options panel, choose the Editing tab, the second tab across the top of the setting panel. In the Editing panel, choose the Formatting tab.
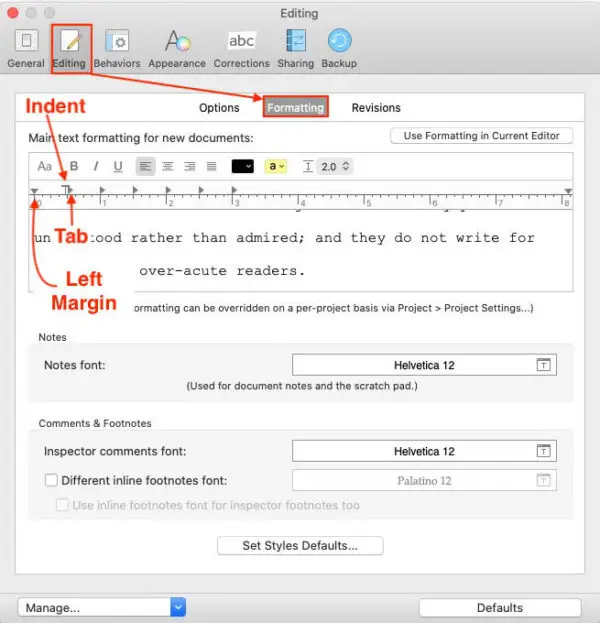
Just as you did in the Project Settings we discussed above, make whatever adjustments you wish. Those settings will be used in all future projects unless you override them with Project Settings that are specific to the current project.
Remember, the default settings will apply only to future new projects. They will be saved when they are set, but will not change anything at all in the currently open project or in any previously existing projects.
Create hanging indents in Scrivener
You easily create hanging indents in Scrivener. First, if you want to create hanging indents for just a section of text, select the text. Then drag the T indent marker on Macs or the downward pointing arrow in Windows to the left margin. Drag the left margin marker (downward pointing arrow in Macs or upward pointing arrow in Windows) to where you want the hanging indent.

It is unlikely, but if you want your entire project to use hanging indents, follow the instructions given earlier to make the same settings shown in the image above in the Project settings panel.
You might also be interested in our article How to Make Scrivener Easier for New Users.
If you are still using Scrivener V1 for Windows, you’ll do yourself a great favor by upgrading to V3 which is on par with Scrivener V3 for Macs.
You’ll find updates from LiteratureAndLatte.com, the creators of Scrivener here.
A note about this tutorial. All of our Scrivener tutorials are personally written based on our own experience with Scrivener. If you would enjoy more in-depth training, we recommend Joseph Michael’s Learn Scrivener Fast Course.
