One of the most useful apps on the market for helping indie authors put their work out in an attractive manner is Vellum. If you use Vellum to format your books for market, you know how nice the finished books look, both eBooks and print.
Table of Contents
Vellum inserts ornamental breaks to indicate when scenes or sections change. It also uses decorative graphics in some of the available heading styles. Some Vellum users don’t know those decorative graphics can be customized.
I’ll show you how to change Vellum’s ornamental break and chapter heading images.
How to Change the Ornamental Break Image in Vellum
The most common styles use a group of images that is provided with Vellum. You can also use your own custom images instead of the built-in options.
The first method of changing the ornamental break image uses the styling carousel.
As of the time this article is being written, there is no way to use multiple ornamental break images in the same book.
For example, we can’t set one break image in chapter one and a different one in chapter two. The image you select will be used throughout the book wherever ornamental breaks are inserted. This is true for those that Vellum inserts automatically as well as for those breaks that you insert manually.
In Vellum, you can use custom images for ornamental scene breaks and chapter headings.
To change the ornamental break image using the built-in styles, open your book file in Vellum. Then at the top of the Navigation panel which displays down the left side, select the Styles tab.
Look for Ornamental Break in the list of book parts. In the center section of Vellum you should see a carousel of images that illustrate the included break styles.
Click through those choices until you find the break image you like best. There are currently seven choices available. Whichever style you stop on will be the one that applies to your book. There is no OK or Select button to click.
Use custom ornamental break images in Vellum
If none of the existing break images appeal to you, you can insert your own custom image. Look below the same carousel where you chose one of the built-in break styles. You’ll see a button labeled Custom Image….
Click that button to upload your own image. If your image is a size that works in that position, Vellum will accept the image. If the image is too small, you will see a message suggesting that you use a larger one.
The recommended dimensions for ornamental break images is 587px X 80px. Vellum support says the image size can vary a bit, but the optimal height is between 80 and 100 pixels.
Note: If you are using Vellum version 3.4 or later on a Mac running on macOS Ventura, you can use SVG images. SVG images will not work if your computer is running any earlier macOS version.
The custom image you upload is the image that is inserted any time you manually or automatically insert an ornamental break.
How to manually insert ornamental breaks in Vellum
If your manuscript is properly formatted when it is imported from Microsoft Word into Vellum, any scene or section breaks that you indicate will automatically be marked with an ornamental break. By default, Vellum will see three asterisks on a line by themselves (***) as a break indicator.
You can also manually insert an ornamental break. To do so, click in the Text Editor where you want the break to appear. Then, do one of the following:
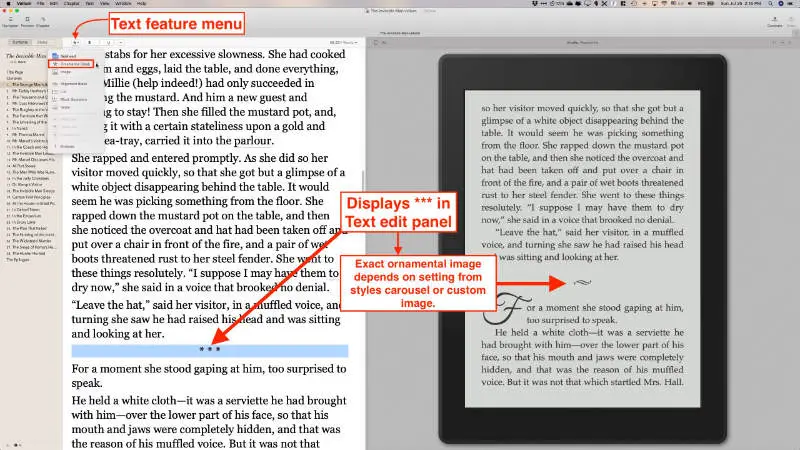
- Go to the Text Feature Menu and select Ornamental Break.
- Go to the Text menu at the top and select Ornamental Break. Select Add Feature > Ornamental Break.
- Hold the Command key and tap the K key.
Any manually inserted breaks will appear in the Text Editor as three asterisks on a line by themselves. They will appear in the formatted book with the image that you selected from the styling carousel or the custom image you added.
Clarifying scene breaks at top or bottom of page in print books
Beginning in Vellum version 3.5 scene breaks that occur at the top or bottom of a page will have an indicator inserted where the scene break should be. These show in print books only.
If for some reason you do not want those scene breaks to be visually indicated, you can disable that feature.
To disable scene break indicators at the top or bottom of pages, you can disable it in the Body settings panel for the style that you have chosen for your book.
With your book open in Vellum:
- Open the Styles panel (using the Styles button above the chapter navigator pane).
- In the center column, select the style that your book is based upon. It will be a different color than the rest.
- Click the Configure button near the top right of the selected style.
- In the left column, click Body.
- Below the Body font setting, uncheck Scene breaks: Clarify breaks at top/bottom of page.
How to insert custom heading images in Vellum
Just as you can create custom Ornamental Breaks in Vellum, you can also use custom decorative images in your chapter headings.
Unlike Ornamental Breaks, each chapter can have its own heading image. If you’d prefer, all chapters can have the same heading image.
To insert custom header images, use one of the following two methods:
Add custom heading image in Vellum – method one
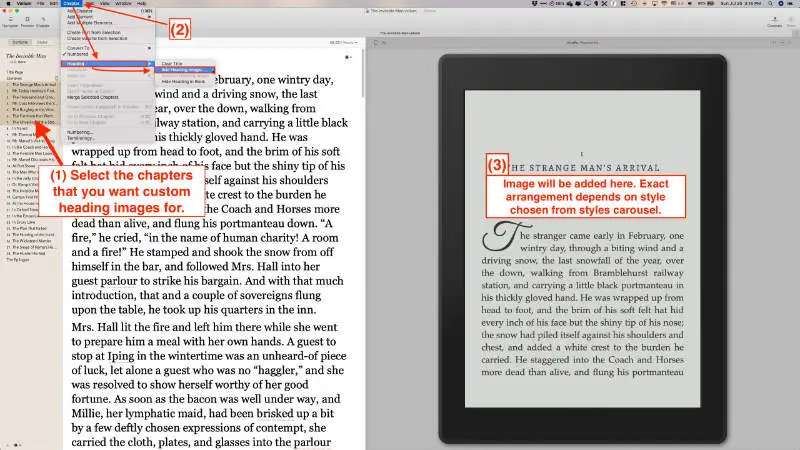
In the Navigator panel on the left, choose one or more chapters that you want to have the custom heading image.
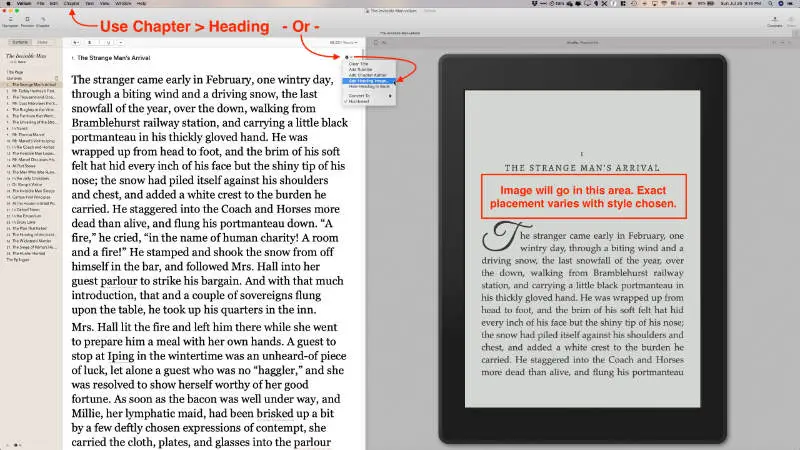
- Go to the Chapters menu at the top.
- Select Heading, then Add Heading Image…
Add custom heading image in Vellum – method two
This method requires you to change the heading image in each chapter separately. If you want all chapters to have the same heading image, I suggest you use method one.
To change the heading image on a chapter by chapter basis, select the chapter in the Navigator panel. Then, do one of the following.
1. Select from the top menu, then Heading > as instructed in the previous method.
2. With the first page of the chapter visible in the Text Editor, open the Heading Menu to the right of the title in the Text Editor. It has a smaller gear icon with a downward pointing arrow. Choose Add Heading Image….
With any of the methods described above, once a custom heading image has been inserted, the Add Heading Image… menu item will change to Replace Heading Image… (allows you to insert a different image). Remove Heading Image will also become active in the menu.
Full page background chapter heading image
Vellum allows you include a full page background on your chapter heading pages.
- Open the Styles panel (using the Styles button above the chapter navigator pane).
- In the center column, select the style that your book is based upon. It will be a different color than the rest.
- Click the Configure button near the top right of the selected style.
- In the left column, click Heading Background.
- In the center column, click on the image icon to select the image for your background. A Finder window will open for you to locate your background image.
- Use the settings below the image to indicate if you want the image to fill the full background on one or both pages and whether you want the image to fill the page from border to border.
- Use the Image Presence setting to adjust how heavy you want the background image to be. The lower the number, the more the image fades away.
Can Microsoft Windows users also use Vellum?
Unfortunately Vellum is only available for Macs. Windows users can use Vellum by running it on a virtual Mac online (not an affiliate link).
Find out more about using Vellum here.
