Can you crop images in Microsoft Word? Yes, you can. Read on to find out how.
Table of Contents
There are a hundred reasons to use photos in text documents such as books, articles, brochures, etc.. Perhaps the image is a logo. Maybe it illustrates steps in a tutorial or serves as a background.
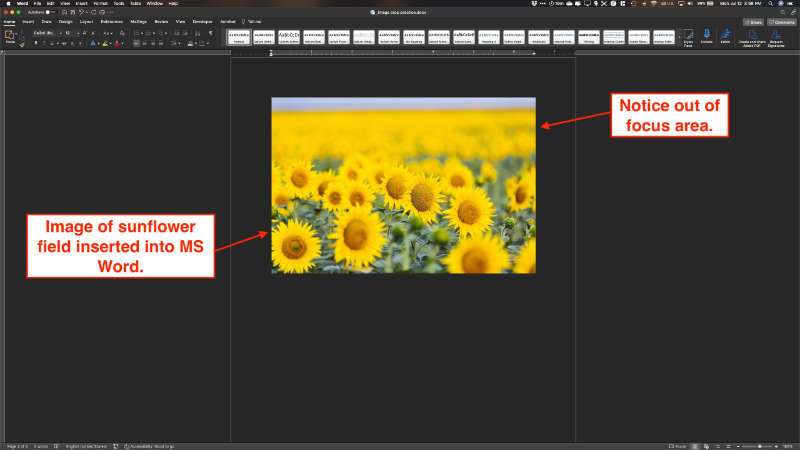
What if you find exactly the image you need, but it includes scenery or other bits that you don’t need? For example, you find a photo of a rural countryside, but you only need the portion of the image that includes a red barn in a green field. Do you look for a different image, or is there a way to trim the image so that you can keep only the part you really need?
That’s where cropping comes in.
If you know how to insert images in MS Word and the only problem your image has is that its physical dimensions are too large to fit in the document properly, you may just need to resize it. We discussed how to insert and resize images in this article.
3 Ways to Crop Images in Microsoft Word
I’ll assume you’re familiar with the procedures for inserting photos in your Word documents. Once you have inserted your image, you can use one of these three ways to crop it. I’ll start with the simplest method.
Crop images in Microsoft Word – method 1
This is simplest and most basic image cropping method in MS Word.
- Right-click on the image you inserted.
- Select Crop from the right-click menu.
- You’ll see a set of handles just inside the border of the image. There’ll be one that is shaped like a 90 degree angle inside each corner. In addition, there’ll be one shaped like a T in the center of the top, bottom, and each side border.
- Click on any of those handles and drag inward across the image.
As you drag the cropping handles, you’ll notice that part of the image is still colored just as it was before you started cropping it. That is the part of the image that will remain when you complete the cropping. The area that appears shaded will disappear.
You can move the live part of the image around. Just click somewhere inside the live image and drag the cropping box around until the exact portion of the image that you want to keep is inside the box.

Note that you can change the dimensions of the live image by dragging any handle further inward or outward toward the original image border.
Once you have exactly the part of the image that you want to keep, hit the enter key. That will make the part of the image that you cropped out disappear, leaving only the area of the image that you wanted to keep.
Note that once you have hit the enter key, dragging the handles around the edges of the image inward or outward will resize the image. Dragging from a corner will maintain the same aspect ratio as the original cropped area. However, dragging the center handles on the top or side will cause the cropped image to be squeezed or stretched. That may result in an image that is distorted and probably not what you wanted.
Crop images in Microsoft Word – method 2
This method involves setting image dimensions and vertical or horizontal offsets. It is my least favored of the three methods, but I’ll show you how to crop your image using measurement settings in case you find it useful.
In MS Word images can be cropped using numbers or by dragging with your mouse.
We’ll first set the dimensions of the final cropped image. Then we’ll adjust the image so that exactly the part you want will be displayed in the final image.
- After you’ve inserted an image, right-click it.
- From the right-click menu, select Format Picture.
- A panel labeled Format Picture will open, probably on the right side of the screen.
- At the top of that panel there are four tabs. Click the last one with the icon of an image.
- There will be four sections below the tab. Those tabs may be open or closed. Click the small arrow on the left of each section to open or close it. Choose the last section, labeled Crop.
- You will see two setting areas labeled Picture Position and Crop Position.
When you first open the crop panel both will show the dimensions of the image as it was inserted.
To set the dimension you’d like to have for the cropped and finished image, enter the width and height in the Crop Position section. You can either type in the dimensions or use the up/down arrows inside the dimension box.
Now to adjust the image so that you see the part of the original image that you wanted, use the Offset X and Offset Y adjustments in the Picture Position section.

Offset X moves the original image left or right within the crop area. Use positive numbers to move the image to the right. Use negative numbers to move the image to the left.
Offset Y moves the image up and down. Use positive numbers to move the image up and negative numbers to move the image down.
When the cropped image looks the way you want it, click anywhere outside the image.
Bonus tip: Instead of using the Offset X and Offset Y settings to set the visible part of the image, you can also do it by dragging the original image around until the part you want to be visible is showing inside the crop box.
To do that, set the image dimensions using the Crop Position section as instructed above.
With the image still selected, right-click the image and choose Crop from the right-click menu.
You should see the full image appear behind the crop box. The image will be shaded out except the portion that shows inside the crop box. Drag the larger shaded image around until the cropped image is how you want it.
Click anywhere outside the image to set it.
Crop images in Microsoft Word – method 3
Method 3 for cropping images in Word provides more creative possibilities.
First, insert the image into your file. When the image is selected, you will notice another tab labeled Picture Format has been added to the ribbon.
If clicking the image did not automatically open the Picture Format tab, click on the tab to display the array of tools that are available to you.
Toward the right end of the toolbar, look for a button/icon labeled Crop. If you click the down arrow on the Crop button, you’ll see three cropping-related options.
1) Crop
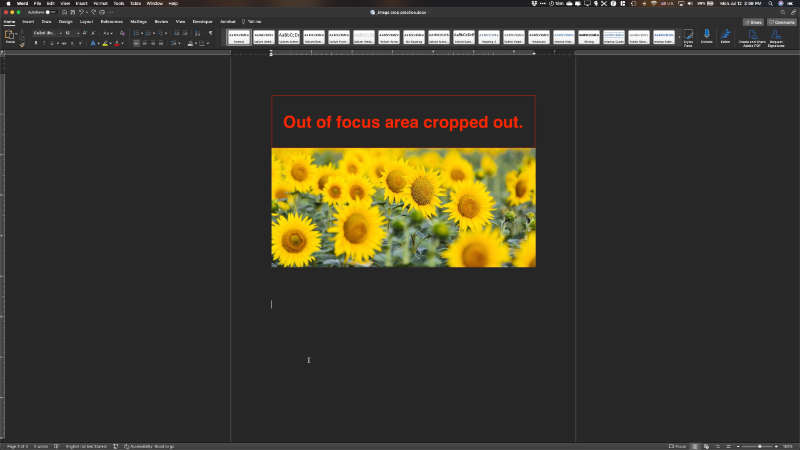
This option allows you to drag all sides of the image in until you have exactly the portion of the image you wanted to keep visible inside the cropping frame.
When you select Crop, in addition to the small square “handles” on each corner and halfway along each side of the image, you’ll see a second set of handles just beside those that you’ll use in cropping the image.
NOTE: You don’t want to use the smaller square handles unless you also wish to resize the image. Dragging those square handles will reduce the size of the entire image, but not necessarily in a way that leaves you with just the portion of the image left that you desired. The cropping handles allow you to select a section of the image that you wish to keep and discard the remainder.
The cropping handles inside each corner are shaped similar to a ninety degree corner bracket. Along the sides the handles are t-shaped with the longest straight edge along the outside edge of the image.
I suggest you start by carefully mousing over one of the corner bracket handles. Click on the handle and drag it toward the center of the image. You can do the same with any other cropping handle. If you find yourself reducing the entire image instead of cropping it, you’ve almost certainly clicked the very small square handle instead of the larger cropping handle.
Once your image is cropped, you can make adjustments to the crop by:
- Dragging any of the cropping handles in or out or,
- Click inside the cropped section. The remainder of the image will be shaded out. As you drag the image around, you will see it come into focus inside the crop box.
- When you see the desired part of the image inside the crop box, click outside the image. The shaded area will disappear.
The part that will be kept is inside the cropping frame. The part outside the cropping frame will be hidden.
2) Aspect Ratio
The aspect ratio pertains to the width of the image compared to the height. If you select the Aspect Ratio option, you’ll see several options of the most popular aspect ratios. The first number is the width, the second is the height.
Click on one and you’ll see a cropped section of your image in the ratio you selected.
Pick another ratio and you’ll see the shape change. For example, if you pick 16:9, you’ll see a cropped area that is approximately 56% as tall as it is wide. If you pick 4:3, you see a cropped area that is 75% as tall as it is wide.
Once you have chosen your aspect ratio, you can click anywhere inside the live area of the image and drag it around until the part of the image you wish to keep is visible.
NOTE: Just as you were able to grab the cropping handles in the corners and sides of the image using the Crop method that we discussed in number one above, you can do the same when you start with an aspect ratio. In other words, selecting an aspect ratio does not tie you to that ratio.
If you decide none of the available ratios suits your needs, you can tweak it by dragging the cropping handles. The aspect ratio option is there to give you a starting place and to help you easily crop your images to some of the more common ratios used in publishing and website production.
3. Crop to Shapes
Now for the fun part. Once you have cropped your image so that it contains only the part you wanted to keep, you can get creative with your cropping by applying shapes to your image. This is done using the Crop to Shapes feature.
First, crop the image to the area you want to keep using method 1 or 2 above. Then, apply one of the shapes to your cropped image. Whatever shape you apply, your image will fill the inside of that shape.
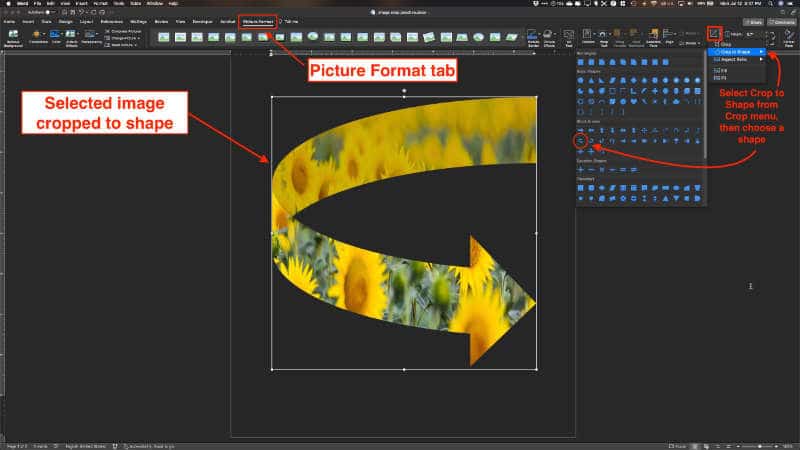
The creative uses for this feature are endless. For example, let’s say you are working on a poster and you want a curved arrow shape pointing to an item on the poster. You’d like to have the arrow to look as though it had been cut from a photo of a sunflower field in full bloom.
You can crop your image of the sunflower field, then apply a curved arrow shape to it. Instead of a solid color, your arrow will be filled with sunflowers from the image you chose.
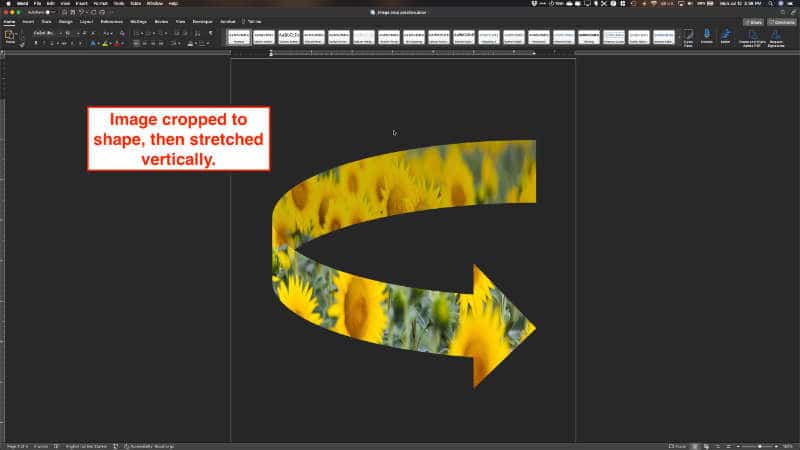
If you apply a shape to an image and you think it looks a bit squeezed, try applying a different aspect ratio to it. The shapes can be applied, whatever size and/or aspect ratio you have selected.
There are dozens of shapes available, from geometric shapes to math signs to moons and stars.
Take time to play around with them. Use different aspect ratios with different shapes. You’ll surely find something you like.
If you have no need for an image in the shape of an arrow or plus sign, just crop your image to the width and height you need and move the shape around until you have only the part of the image you wish to keep.
Saving a cropped image out of a Word document
Microsoft Word allows you to save any image from a document by right-clicking the image and choosing Save as Picture.
Please be aware that images with extensions .jpg, .gif, .png and others are rectangular or square regardless what you see on the page. The arrow with the sunflower background is still a rectangular image. You don’t see the background surrounding the arrow in the document where the image was originally cropped because Word makes the part of the image that is cropped out transparent.
On most computers Microsoft Word documents appear to have either a white or dark background, depending whether your computer is set to use light or dark mode. However, MS Word page backgrounds are actually transparent unless you assign a page background color.
In our working example, if you were to save the image from that document with a white background, then insert it into a different document with a blue background, you wouldn’t see just the sunflower-filled arrow. You would see a white rectangle with a sunflower-filled arrow inserted into a document with a blue background.
You can, however, save your sunflower-filled arrow as an image with a transparent background which you can then insert into other documents.
To save an image from a MS Word document with a transparent background, right-click the image and select Save as Picture. You will probably see a .png extension after the file name you chose. If so, that’s good because that will save the image that has been cropped to a shape with a transparent background.
If you see a .jpg extension or a different one that is not .png, your image will probably be saved with a white background. Look for the setting in the Save as Picture settings panel that allows you to change the image format and select .png. Then, if you desire to, you can insert that image into a different document and have a ready made sunflower-filled arrow.
Final notes on cropping and compressing images in Microsoft Word
After you’ve inserted your images and finished the document, you can just save it as usual. If you don’t compress the image that you resized and/or cropped, your document will have a larger size in kilobytes or megabytes because the part of the image that you cropped out is actually still in the file, just not visible.
If you decide you’d prefer a different aspect ratio, for example, just reopen the document and select the image. Then choose the Picture Format tab and make whatever changes you wish to make.
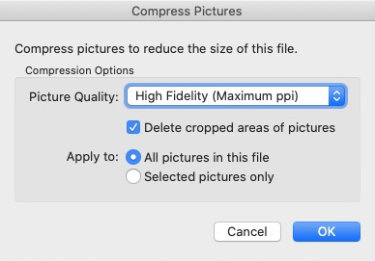
To freeze the image so that it can’t be changed you can compress the image and tell Word to delete the cropped portions of images.
To delete the cropped portions of images in Microsoft Word, select the image. Then in the Picture Format tab, click the Compress pictures button. About half-way down in the Compress pictures panel, check the box next to Delete cropped areas of pictures.
You can find more information about cropping images in Microsoft Word here.
