Overlays can enhance the usefulness of images in our documents. In this tutorial, I’ll show you how to create overlays on images in Word.
Table of Contents
Create overlays on images in Microsoft Word
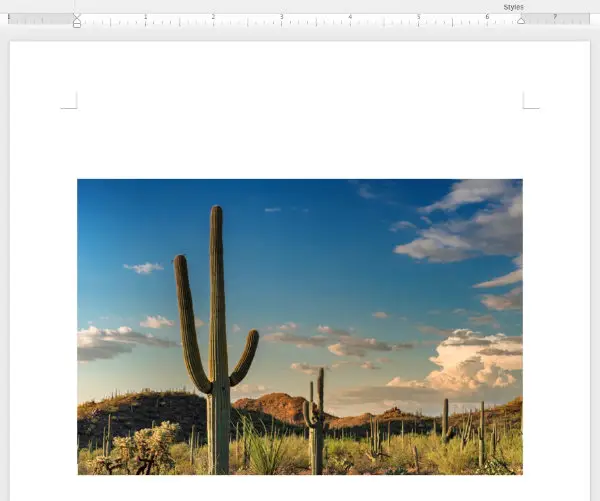
The overlay is built on top of the image. So, the first step will be to insert the image into your document.
For this tutorial, we’ll be inserting an image that is currently stored on your computer. You may choose to insert a stock image or one from elsewhere online.
Important: In the instructions that follow, you may notice that you are never told to click the OK button to save your settings. There are no OK buttons in the settings that we’ll use. However, you will want to be sure you save your document to capture the setting changes that you make.
The screenshots used in this tutorial are from Word for Macs. If you work on a Windows computer, you will notice the usual visual difference. However, all of the same buttons and other settings are available in Word for Mac and Word for Windows.
Insert an image in Word:
- Open the Insert Tab.
- In the Illustrations section, click the Pictures button.
- Click Picture from File…
- Use File Explorer on Windows computers, or Finder on Macs to locate your image.
Insert a rectangle shape over the image
The method I use to create image overlays in MS Word is to insert a rectangular shape over the image. I drag the rectangle until it perfectly covers the image. Then, I make changes to the rectangle until I get the effect that I want.
I’ll give you my preferred method first. I will tell you about a slightly different method later.
To insert the shape over the image:
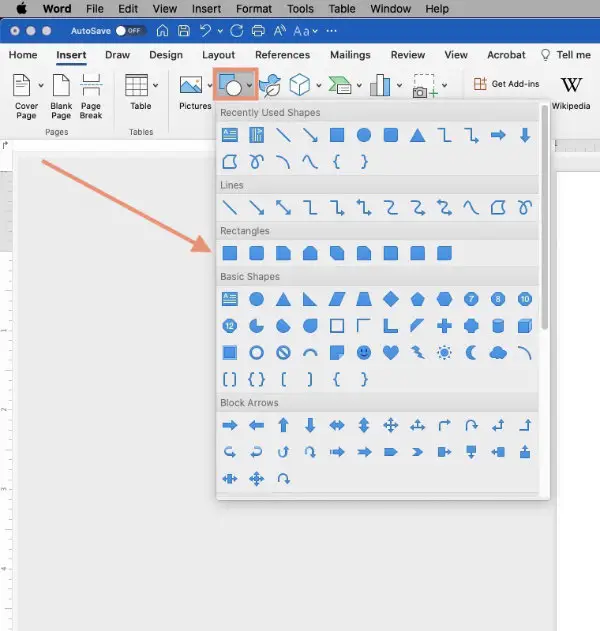
- Open the Insert tab.
- Click the Shape button. A panel with dozens of shapes will open.
- Near the top, you will see a few rectangles. Click a rectangle icon. Any of them will work and can be dragged to a square or rectangular shape. Be aware that some have square corners. Some have radiused, or rounded corners.
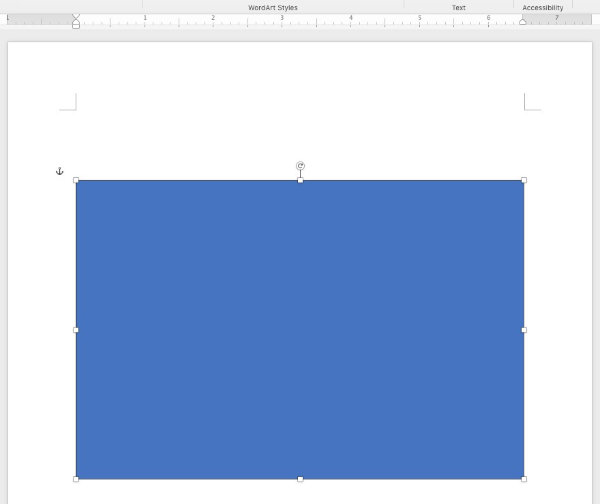
For this exercise, I’ve chosen a rectangle shape with square corners. If you prefer your image and overlay to have radiused corners, choose a shape with rounded, or radiused, corners. Keep reading to learn how to make your image shape match the overlay shape.
When I insert a shape over the image, it always has a blue background by default. I’ll be changing that to a different color.
Insert a shape with rounded corners over the image
If you choose an overlay with rounded corners, you will need to crop your image to the same shape that your overlay will be. If you don’t, you’ll finish with an overlay with rounded corners over an image with square corners.
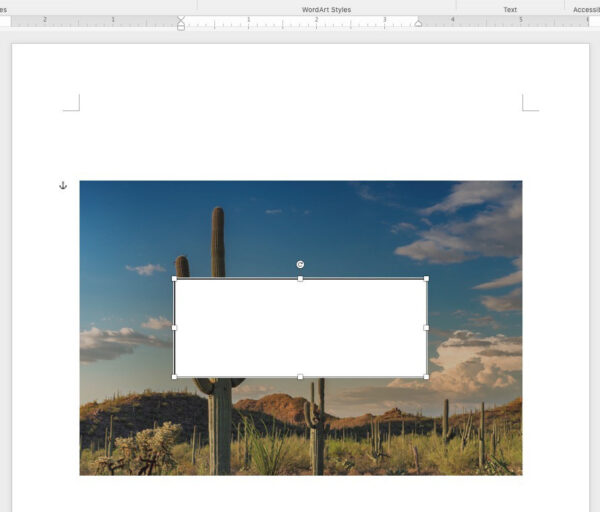
The following image illustrates how our demonstration image might look with rounded corners.
- Select the image that you inserted.
- Open the Picture Format tab.
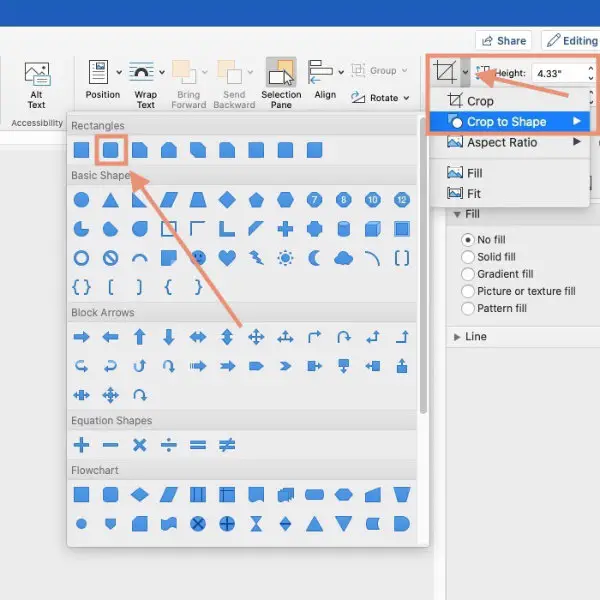
- Far toward the right end of the ribbon, you will find a Crop button. Click the arrow on the right side of the button. Just clicking the crop button will not give you the options you need.
- Select Crop to Shape.
- From the Shape panel that opens, select the same shape that you’ll be using for your overlay. Your image will now have rounded corners.
- Drag the shape to match your image’s size. If you chose the same shape for the image and overlay, you should be able to match them perfectly.
The remaining instructions are illustrated with square corners. They will work for the overlay with rounded corners just as they do for square corners.
Set the overlay color
Shapes in Word have two different parts that can be colored. One is the background. Word calls that the Fill. The Fill refers to all of the area inside the border.
The other part that can be colored is the border, which Word calls the Line.
To set the overlay color, we’ll need to give the shape’s interior, or Fill, a color.
- Right-click inside the Shape.
- Choose Format shape… to open the settings panel in the right sidebar.

- In the panel, select the Fill tab. The button icon looks like a can with paint being poured from it.
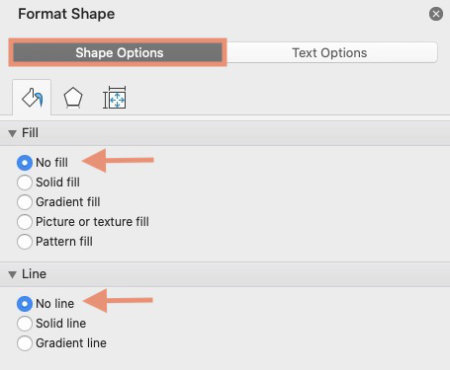
- The top section is labeled Fill.
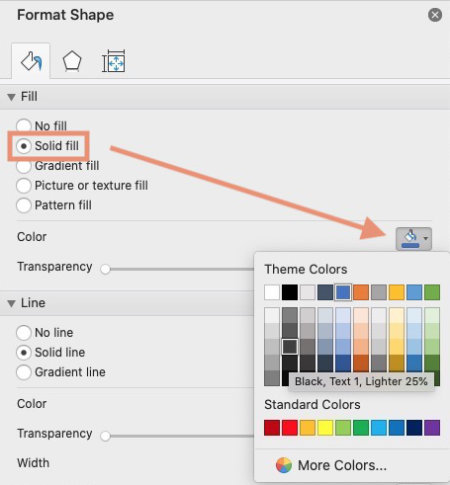
- Click beside Solid Fill.
- Below the fill type choices is the Color section. Look for a small square button with the same icon of paint pouring from a can on the right side of the panel. Click that button to open the color chooser.
- Select a color. For this tutorial, I’ll choose a dark grey (black, Text 1, lighter 25%). You should choose the color that is appropriate for your project.
Set the background transparency level
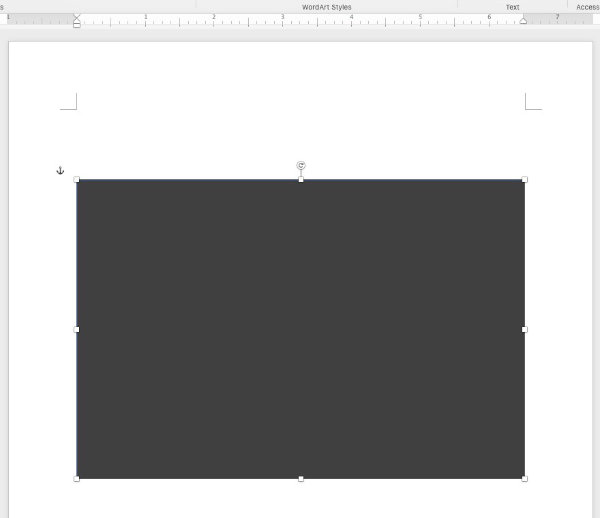
When you first set the color, it will be completely opaque, obscuring the image behind it.
If you want a colored, but transparent background, you will probably want to start with a darker shade, then lighten it. As you increase the transparency, the apparent color will become lighter.
If it is still too dark, step up to the next lighter shade and repeat until you get the effect that you want.
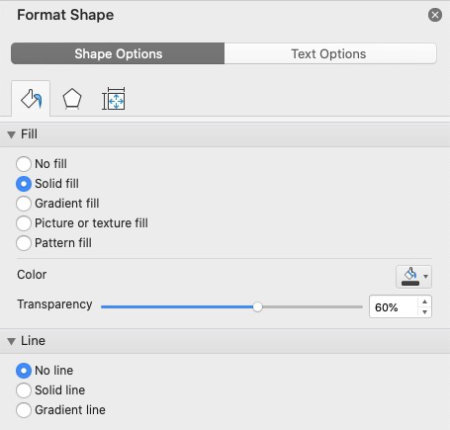
On the same tab where you selected the Fill color, look just below the button where you set the color. You will see a slider labeled Transparency.
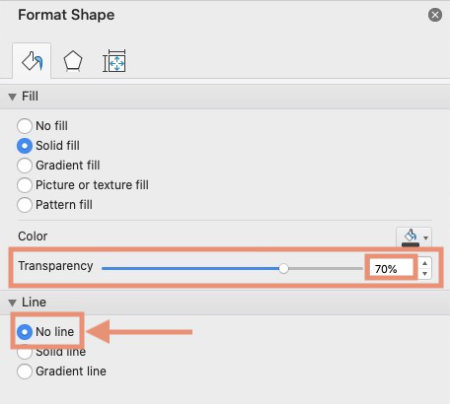
To make the background transparent, move the slider across from left to right until you can see your image appearing through the color.
Stop moving the slider when the balance between the overlay color and the image showing through it suits you.
I personally prefer to use the slider, but if you aren’t too fond of sliders, you can use one of the following methods to accomplish the same thing.
- In the box to the right of the slider, type a number to set the transparency. The number will be a percentage between 0 (0% transparency) to 100 (100% transparent).
- Instead of typing the transparency in the box, use the small up or down arrows in the box to increase or decrease the percentage.
Create an artistic border around the overlay
If it is appropriate for your project, you can make the border a bit more decorative.
NOTE: You can separately apply frame-like borders to the image using Picture Styles. (Select the image, then find the frames in the Picture Styles section under the Picture Format tab.) The border we are discussing in this tutorial is the one around the overlay, not around the image behind the overlay. Since our focus is on the overlay, the examples in this tutorial do not use Picture Styles.
Rather than demonstrate all of the line style options, I’d encourage you to use the instructions below to find the settings, then play around with them.
You won’t hurt anything. And, if you decide you don’t like what your border has become, use Control + Z on Windows computers or Command + Z on Macs to undo the changes you made. Repeat for each change you want to undo.
The overlay border is thin by default but can be widened.
To make the border more artistic, open the Format Shape panel as you did for the fill color.
The section below the Fill color settings is Line settings.
The Line settings area gives you three choices:
- No line
- Solid line
- Gradient line
Choose Solid line.
The next option down the settings panel is the Line color. Set it the same way you set the Fill color earlier.
Below the Line color is the Transparency slider. If you want your border to be transparent, drag the slider to the right to increase transparency.
The setting below Transparency is labeled Width. It may seem an odd name for a border, but width just dictates how thin or heavy your border line is.
The default line width is 1. Increase it to make the line wider like a picture frame might be. To effectively use the line Transparency slider, your line will need to be fairly wide.
The next three buttons – Sketched style, Compound type, and Dash type – give you ways to turn your border into something more than a simple straight line.
For example, if you set your line width to 5, then click the Sketched style button and choose Scribbled, you will get a wavy and heavy border with a less than serious tone. It could almost appear hand-drawn.
Disable the border around the overlay
If your idea of the ideal overlay doesn’t include a border, you can disable it.
To disable the border around the overlay:
- Right-click inside the shape.
- Click Format Shape…
- Click the same Fill tab.
- Just below the Fill section, click Line to open the Line section.
- Click beside No Line.
The border around your overlay should have disappeared.
Insert text on an image overlay
You can insert text in front of, or on, an overlay. The two easiest ways are:
1) Insert a text box in front of the overlay and type your words there.
2) For the overlay itself, insert a text box instead of choosing the square shape to insert in front of your image.
A text box is a type of shape and can be styled in basically the same ways as an empty shape. You can apply background colors, make it transparent, apply gradients, etc.
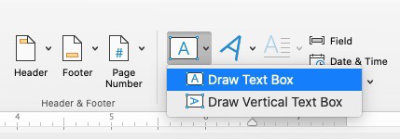
You will find the Text Box button under the Insert tab.
- Click the Text Box button.
- Select Draw Text Box.
- Click your mouse on top of your image and drag to the desired size.
For this exercise, I’ve chosen to insert the shape for the overlay itself, then insert a text box in front of the overlay.
This method allows me to set the text box’s transparency, etc. separate from the overlay and its style settings.
If we use a separate text box for the text, we can set the text alignment, etc. with the text box and place the box anywhere we wish in front of the overlay. We can center it in front of the background image or drag it wherever we prefer to have it.
Using a text box for the overlay will allow you to style the background and have text with its own styling. But you will have more precise control over the text styling and positioning if you handle it separately.
Because a text box is a type of shape, you use exactly the same procedure to set transparency, borders, background (Fill) color, and gradients as you use in the shape you inserted over the image.
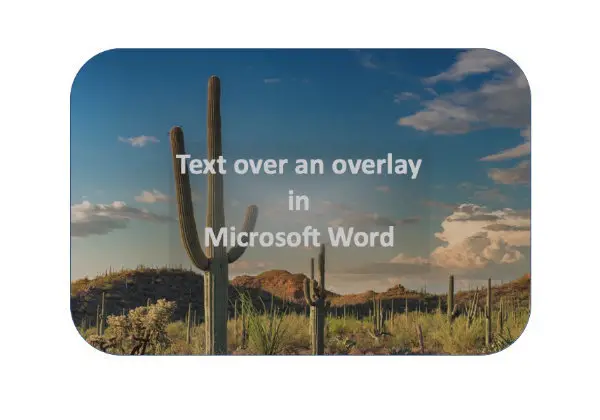
In the following image you can see the text box that previously had a white background is now transparent. I have typed a title in the text box.
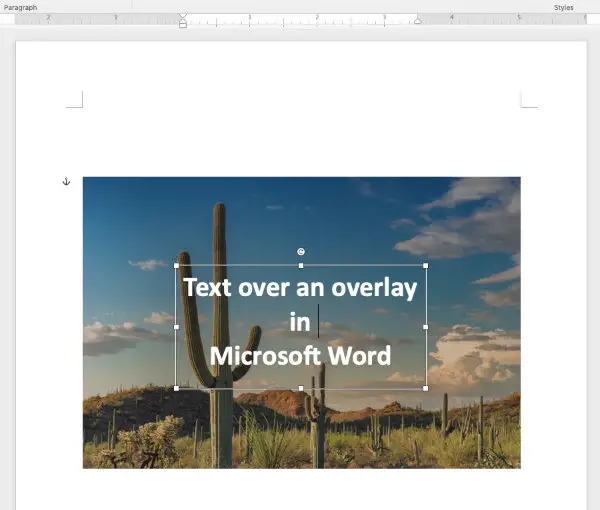
That control could come in handy if you are using the text box for something like a bold title and want to use position to help bring attention to it. For example, you can use MS Word text boxes to create vertical titles on your overlay.
Apply rounded corners to a text box in MS Word
Text boxes in Word are drawn with square corners by default. If your image has rounded corners, and you are using the text box to create an overlay, you’ll want your text box to have rounded corners as well.
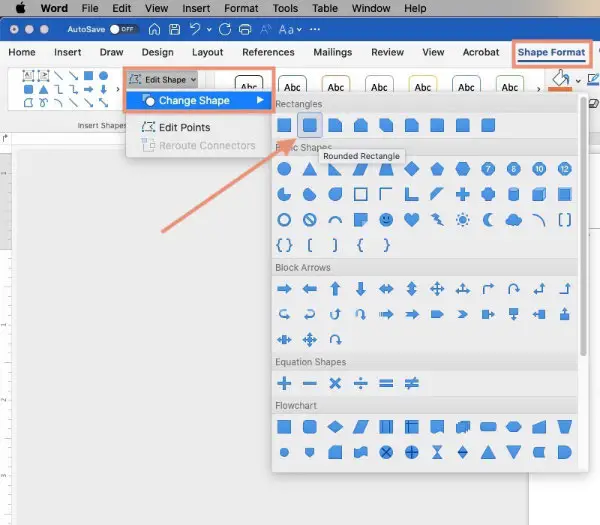
To make your text box the same shape as your image:
- Select the Text box.
- Open the Shape Format tab.
- In the Insert Shapes section, click Edit Shape.
- Mouse over Change Shape. A Shapes panel should open.
- Select the same shape you used for your image.
Drag the edges of the text box to match the image, if necessary.
Note: You can use this process to edit any Shape, not just text boxes.
Apply a gradient to your overlay
An overlay gradient gives the effect of the overlay being darker in one area of the image than another. It may be darker in the lower left than the upper right, or darker in the right half than the left half.
The lightest area could be in the center of the image or around the edges.
You can have multiple colors in your gradient. The two ends of the gradient may start with different colors. For example, the overlay might fade from orange to yellow.
To apply a gradient, follow the same instructions given earlier for setting the Fill color. But in the last step, instead of choosing Solid Fill, choose Gradient Fill.
A different group of settings will become available.
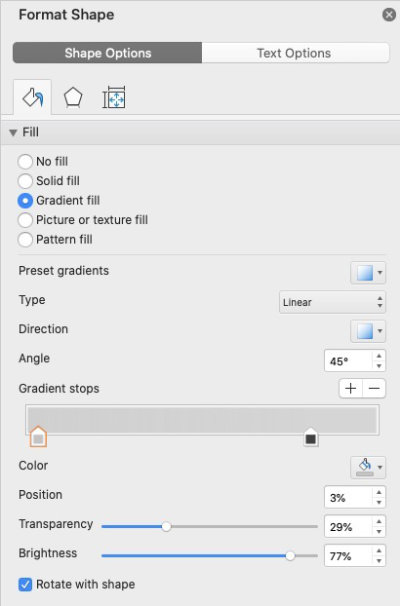
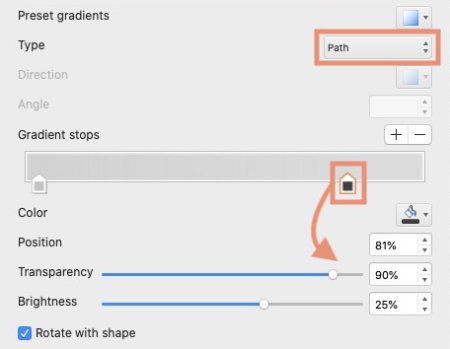
Preset gradients: Provides a selection of predefined gradients in an assortment of colors. You can choose one for a starting point and edit the colors, directions, etc..
Type: Gives you four types of gradients to choose from. They are Linear, Radial, Rectangular, and Path.
A Linear gradient forms along a fairly defined line.
Radial gradients may start with a circle in the center that can either be the lightest area or the darkest, depending upon the direction you set for it.
A Rectangular gradient may begin with an obvious 90º angle.
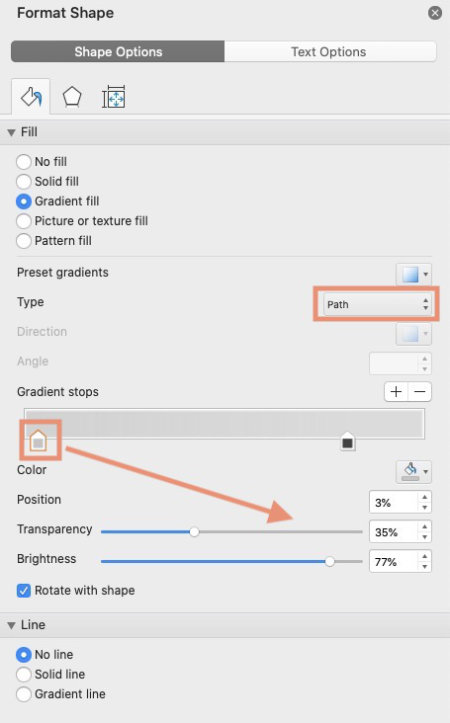
Path allows you to create gradients that are similar to Radial but more angular. They’re often used with gradients that are lighter in the center but more defined as they move toward the edge of the gradient. In the case of a gradient filling a rectangle like our image overlay, a Path-type gradient can begin with a fairly well-defined rectangle in the center with lines that connect the inner and outer corners of the gradient.
Shortly, you’ll read about Gradient stops. They can be used to change the size and clarity of that inner rectangle. In fact, in a Path gradient, they can even make that inner rectangle disappear, leaving a star effect with a bright spot in the center and “beams” radiating toward the corners of the image.
All of the Type options allow you to make changes to them to suit your needs and taste.
Direction: Allows you to change the direction of your gradient. If you click the Direction button, you will see a number of preset options to choose from. You can select one, then leave it as is, or you can edit the one you select.
Angle: Only available when Linear is chosen as the type. It allows you to set the angle that the line follows across the gradient.
Gradient stops: Allow you to add colors and control the way colors along the gradient blend with each other. They basically dictate where one color begins and another one ends. They can help define the sharpness of the line that divides the colors. I’ll give you more detail shortly.
Position: Increase or decrease the percentage. You’ll see the affected stop moving left or right along the bar. The Position setting just allows you to numerically set the position instead of dragging the stop along the bar.
Gradient stop settings
The following settings affect the Gradient stops individually. To use them, you must first click on a Gradient stop.
Color: Click the button to open the color chooser where you can set the color for an individual stop.
Transparency: This allows you to make one part of the gradient more or less transparent than the others.
Brightness: Allows you to make one part of the gradient more or less bright than the others.
Lock the gradient settings if the image is rotated
The last setting in the gradient settings panel is a simple checkbox.
Rotate with shape: If checked, the gradient settings you’ve made will move with the image if it is rotated.
Using gradient stops in MS Word
When you slide the stops along the bar, you’ll see the blend and order of the colors change. Used properly and in conjunction with the other settings, they can transform the look of your gradient tremendously.
To add Gradient stops, click the + button just above the bar.
If you are creating a multi-colored gradient, you should have a stop for each color.
If your gradient is different shades of the same color, and you’re experiencing difficulty getting the results you want, you may want to try assigning the same color to three or four stops, then adjust them individually as needed. Remove any unneeded stops, or add more if necessary.
To remove an existing Gradient stop, select the stop, then click the – button above the bar.
Finished image with overlay, title, and text box gradient
The following image is the same image we began with. The overall process included these steps:
- Insert an image.
- Insert a Shape over the image to create an overlay.
- Set a Fill (background) color to the Shape.
- Set the Fill to 70% transparency.
- Insert a Text box to contain the title. (The Text box is much smaller than the overlay.)
- Set a Fill color to the Text box (the same color as the overlay fill).
- Type the title in the Text box and set its color.
- Create a Path gradient in the Text box and made it lighter in the center. The outer parts of the gradient are darker to help the text stand out against the background.
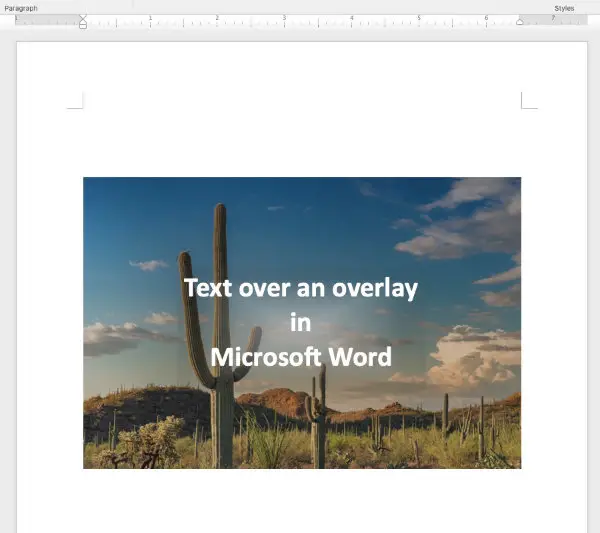
Image overlays VS transparent images in Word
Microsoft Word has a feature that allows you to apply transparency to an image.
When the transparency is set to certain levels, it can create an illusion of an overlay. It is not the same thing as actually creating an overlay, though.
I see two significant differences.
When you apply transparency to a Fill in a Shape such as the rectangular box that we used in this tutorial, you cause the background of the box to become transparent, or see-through. You can apply one or more colors to the Fill to create multi-colored overlays.
When you apply transparency to an image using the Transparency button in the Adjust section of the Picture Format tab, Word lightens the image, creating the illusion that an overlay has been applied.
It is not possible to change the color of that illusionary overlay since no overlay is actually applied.
You can follow the steps you read earlier to insert a shape and set the color, transparency, etc. In that case, you’ll most likely find that applying transparency to the image itself is unnecessary and unhelpful.
You could use the color tools that Word provides to tint images. For my preferences, I find that method does not give quite the same effect that an overlay can provide.
If you want to give them a try, select your image then, open the Picture Format tab. In the Adjust section of the Ribbon, click the Color button.
There are situations where applying transparency to an image would be a good option.
One such situation is when you want a background image that appears faded. You sometimes see that on a letterhead, where your company logo appears in the center background of the sheet.
You can insert the image, apply transparency to it, then change your word wrap settings so that text flows across in front of the image.
More advice about using gradients in MS Word picture overlays
There are so many possibilities when creating gradients in overlays, that it’s impossible to cover every possible situation or outcome in one article.
My goal has been to show you how to create an image overlay in Microsoft Word. That’s the easy part. Every person’s artistic taste and ability are different.
For that reason, I suggest you insert the rectangle shape on top of your image and set a color for it. Then, just take some time to play around with the gradient settings that I described.
You’ll soon find exactly the combination of settings that works best for you.
