The corkboard in Scrivener is a very useful tool for writers who are visual organizers. Users can change the corkboard background in Scrivener to fit the way they work. This could be especially helpful for those writers who arrange the parts of their manuscript using bits of paper or file cards pinned to a board.
In a previous article we looked at how to change the background in Composition mode and the Editors. In this article, we’ll look specifically at how you can change the background in the Corkboard.
Table of Contents
How to change the corkboard background in Scrivener
In Scrivener, you can set the corkboard to be used one of three ways.
- Grid, with cards displayed in specific patterns which can be adjusted by the user. Cards will be displayed in the same order as the Binder.
- Freeform, with cards dragged around the corkboard to any location and order.
- Arranged by label, which places cards in order but under specific labels if any have been assigned to the document represented by the card.
Scrivener allows you to set the background separately each of those corkboard types.
Change the grid corkboard background in Scrivener
In Scrivener, you can set the corkboard to use a structured layout with a certain number of cards across, size of cards, etc..
If you use the corkboard that way, the background that you choose will be more decorative than utilitarian.
For example, you can choose to have the background look like an actual corkboard.
To set a corkboard image for the background, you can use the one that Scrivener provides.
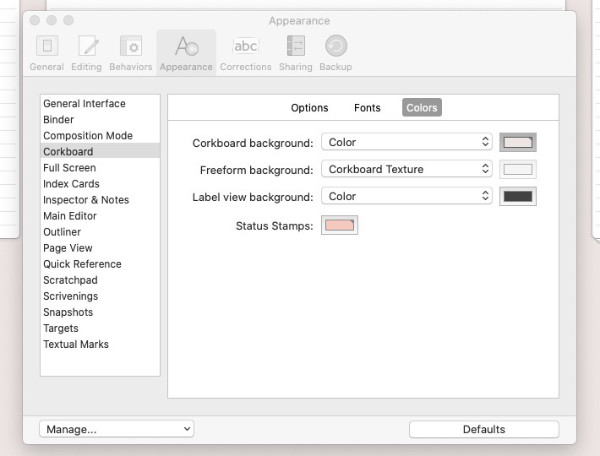
First, go to Scrivener > Preferences in Scrivener for Mac, or File > Options in Scrivener for Windows.
- Open the Appearance tab
- From the list on the left, select Corkboard.
- In the right side panel, open the Colors tab.
- Click in the dropdown box under the first option – Corkboard background.
You will be given three choices in Scrivener for Macs:
- Color
- Corkboard texture
- Custom background…
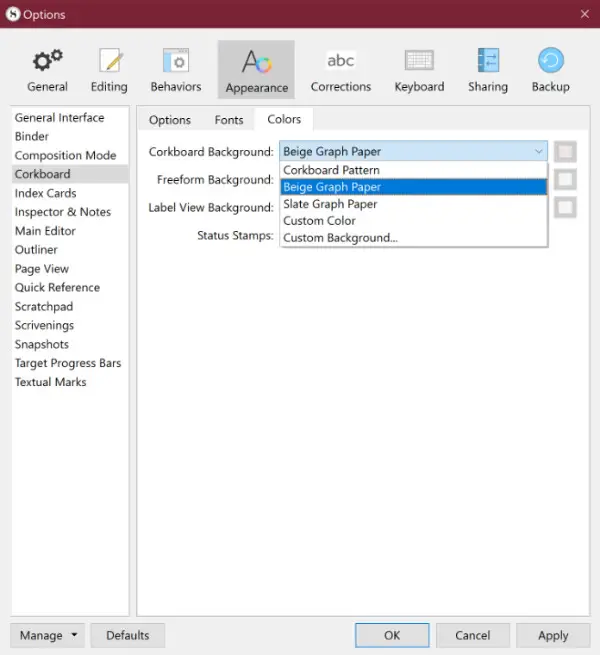
In Scrivener for Windows, the choices are:
- Corkboard Pattern
- Beige Graph Paper
- Slate Graph Paper
- Custom Color
- Custom Background…
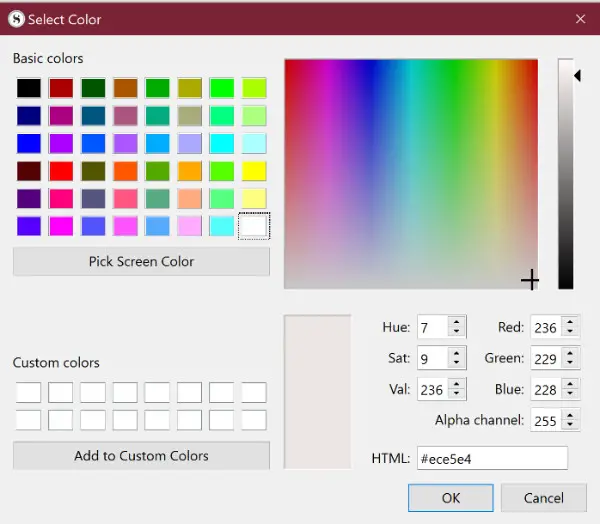
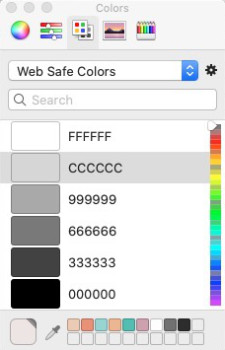
The Color (or Custom Color) option, is probably obvious. It allows you to set a solid color as your background. After you choose Color, click on the small rectangle to the right of the dropdown box. That will open the color chooser panel where you can select any color you wish.
If you choose the Corkboard texture (Corkboard Pattern) option, the background will have the appearance of real cork.
For purposes of this tutorial, we won’t go into detail about the two graph paper options in Scrivener for Windows. They do exactly what you’d think. They insert a background that looks like beige or slate colored graph paper.
The last option, Custom Background… allows you to use any background image. You might choose this option if you want the appearance of a different wood, a nature scene, or perhaps a woven fabric.
An online search for texture images will bring up a long list of websites that offer thousands of free and paid texture images.
Texture images are usually small images that repeat horizontally and vertically to fill the background. You might not get the result you want with such small repeatable (also called tileable) images.
For example, if you prefer a background that simulates some exotic woodgrain, you might be better off using an image that is large enough to fill the background without tiling.
You’ll know you need a single image to fill the background if you see the background repeating and it looks like a bunch of identical images side by side instead of one fluid image.
Change the freeform corkboard background in Scrivener
Writers can also set the corkboard so that they can arrange the cards in a way that best suits their way of working. The Freeform corkboard in Scrivener allows you to drag your cards wherever you want them.
To change the freeform corkboard background, follow the instructions given in the previous section. The difference will be that instead of clicking the dropdown box labeled Corkboard Background, you’ll click the dropdown labeled Freeform Background.
The options available for setting the Freeform background are the same as those for the Corkboard background.
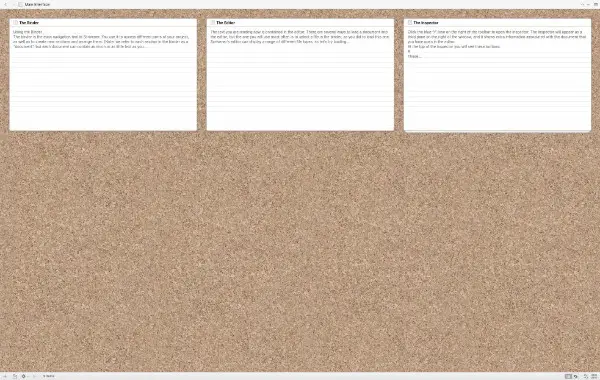
In the following image you’ll see one use of a background image in the Freeform corkboard. We created an image that simulates a blackboard or chalkboard.

We divided the blackboard into three columns, drawn with chalk. Then we labeled each of the columns – Location, Character, and Time.
Now, if we want to separate our file cards into those columns, we can easily drag them into the correct column.
Of course, you could label the columns any way that works for you. And it doesn’t have to be a blackboard.
NOTE: If you create your own background with columns or other layout markings for a use similar to the one I described, you will need to size it specifically for your computer and the way you set up Scrivener. Scrivener’s User Manual suggests adding a bit of padding to the top, bottom, and right to help keep your image in exactly the position you want. Padding in this case is extra blank space beyond any text or lines.
Keep these things in mind as you create your Scrivener corkboard background image:
- Screen resolution matters. If you use a very large image on a computer with an average or lower resolution display, you probably won’t see the entire image in the corkboard area. Conversely, if you have a high resolution display and you use a smaller background image, it will almost certainly tile (repeat to the right and down).
- Your Scrivener layout matters. If you create the corkboard background image so that it perfectly fits with the Binder and Inspector visible, the image will tile if you hide the Binder, Inspector, or both.
A pixel ruler can help you determine the size your background image should be. It works just like any ruler, except it measures in pixels instead of inches.
I keep Free Ruler installed on my Mac and use it frequently. It is very simple to use. Just open it and drag it to measure the space you need to fill. It includes a vertical and horizontal ruler.
A Google search for onscreen pixel ruler will bring up several choices for use on Windows computers.
Change the Label View corkboard background in Scrivener
The Label View Corkboard allows you to organize cards according to the labels you use in your project. Each label will have its own color and will represented by a line of that color. Scrivener’s creators call those lines rails.
You can change the Label View background the same way you change the Corkboard or Freeform boards.
- Go to Scrivener > Preferences in Scrivener for Mac, or File > Options in Scrivener for Windows.
- Open the Appearance tab
- From the list on the left, select Corkboard.
- In the right side panel, open the Colors tab.
- Click in the dropdown box under the first option – Label View background.
You can insert the corkboard look or any image you choose, just as we discussed in the previous sections. If it were me, I would probably just choose a solid color background so that the label colors would show easily. The Label view corkboard has a black background by default but can be changed to any other color.
A note about this tutorial. All of our Scrivener tutorials are personally written based on our own experience with Scrivener. If you would enjoy more in-depth training, we recommend Joseph Michael’s Learn Scrivener Fast Course .
