There are a number of reasons a person might wish to save a Word file as a JPEG image. Perhaps you’d like to include a photo of a document in a blog post or a print publication. Maybe you’d like to send a photo of your work to a co-worker.
Table of Contents
Unfortunately you can’t directly save a Microsoft Word file as a JPEG, but there are ways to accomplish almost the same thing. In this article you’ll learn the steps to create images of Microsoft Word files on Mac and Windows computers.
Save a Word file as a JPEG on Mac computers
The easiest way to create an image of a Word document on Macs is to use the Screenshot app. The Screenshot app will only catch what you can see in one screen without scrolling. If the resolution of your computer’s screen is high enough that you see an entire page of your Word document without scrolling, you can move on to the next paragraph. If one page in your Word document is too large to fit on the screen, you can use the Zoom control in the lower right corner of the Word window to reduce the size until an entire page will fit onscreen.
You can find Screenshot at Finder > Applications > Utilities > Screenshot.app.
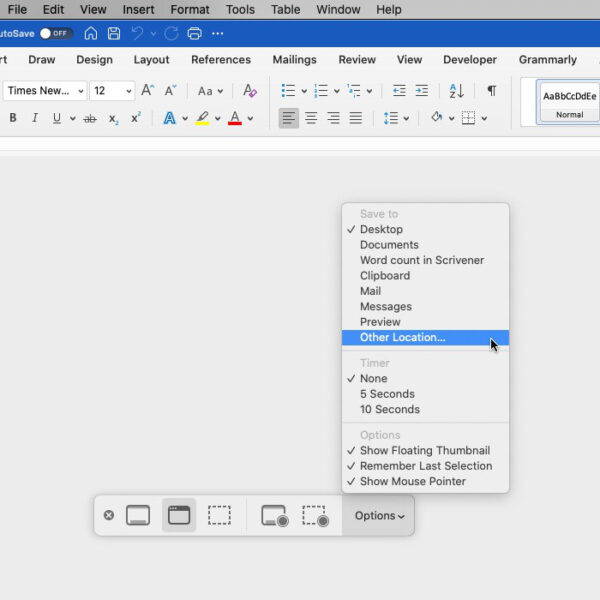
If you haven’t already done so, you’ll probably want to tell Screenshot where to save your image before you take the shot. Open Screenshot and in the floating settings bar, click Options. In the top section of the menu that opens, you can set a location for your screenshots. By default they should save to your desktop.
Take a screenshot of your Word document
With your document open so you can see the entire portion that you want an image of, hold down Shift, Command, and 4 at the same time.
Your mouse pointer will change to a crosshairs. Click at the top left corner of your Word document page and drag to the lower right corner. When you release the mouse button, an image of the page will appear for a few seconds in the lower right corner of your screen. If it disappears from there, you’ll find it wherever your Screenshot app is set to save images.
Get a JPEG copy of your MS Word file using Preview
Other than the Screenshot app, the easiest way to create a JPEG (or JPG – the same thing) of a Microsoft Word file on Macs is to use the Preview app which already exists on your Mac.
With your document open, select the text that you want to be included. If you want just a paragraph included in the image, select the entire text of the paragraph. If you want to include the entire document in the image, press Command + A to select the whole document. Then,
- Open the File menu.
- Click Print.
- Under Pages: select All, Current page, Selection (if you selected a section of text), or a range of pages.
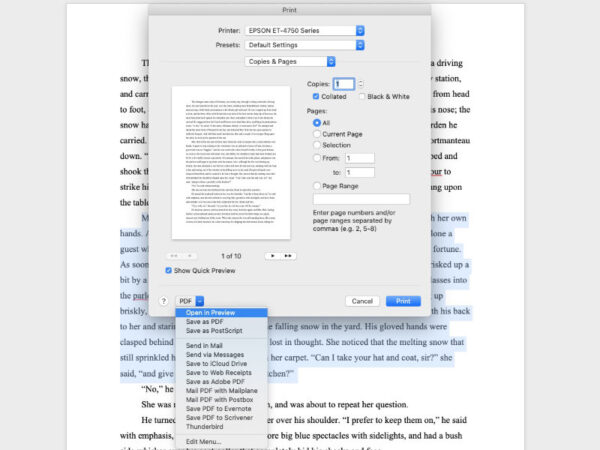
- In the lower left corner of the print dialog panel, click PDF.
- In the list that opens, select the first option, Open in Preview. Do NOT click the Print button. The Preview app will open with the Word document displayed and converted to a PDF.
- In the left column of the Preview app, select the page you want to convert to a JPEG. If you want more than one page converted, you’ll need to repeat the process for each page. There is a Print button on this panel, also. Do NOT click it.
- In the Preview app’s menu, go to File, then Export… (not Export to PDF…).
- At the top of the Finder window that opens, choose a name for the file.
- There is a dropdown box below the file name and above the Finder section. Click that box to set the location to save the JPEG.
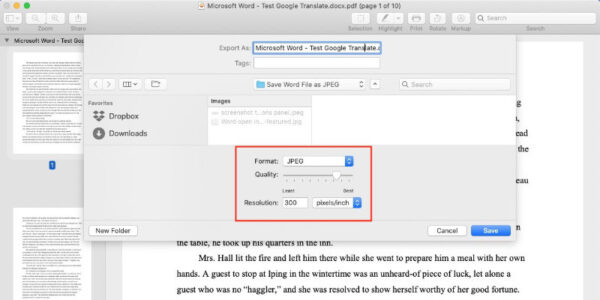
- At the bottom of the Finder window, click in the drop-down box beside Format:.
- Select your chosen image format. In this case, JPEG. Other image options include JPEG2000, HEIC, PNG, and TIFF.
- Set the quality level for the image.
- Set the Resolution. If you intend to print the image or include it in a document that is to be printed, I suggest you leave it at 300. Anything above 72 will work if you just intend to use it in a blog post or other online web page.
- Click the Save button.
You should find the JPEG of your Word file in the location you chose to save it in step 9 above.
Save a Word file as a JPEG on Windows computers
The options for saving a Microsoft Word file as a JPEG image in Windows are similar to MacOS, but not quite as simple.
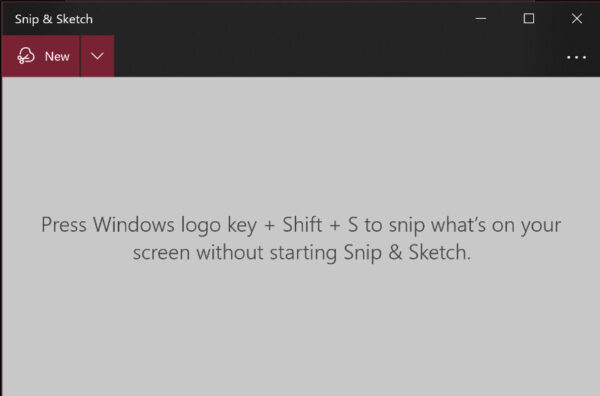
Like the instructions for Mac users, if an entire page of your Word document is visible in the window without scrolling, the simplest way to get a JPEG of your Word file is to take a screenshot of it using the Snip and Sketch app.
If a single page of your Word file is so long that you can’t see the bottom of it, you can use the Zoom tool in the lower right corner of the MS Word window to reduce the size until it fits.
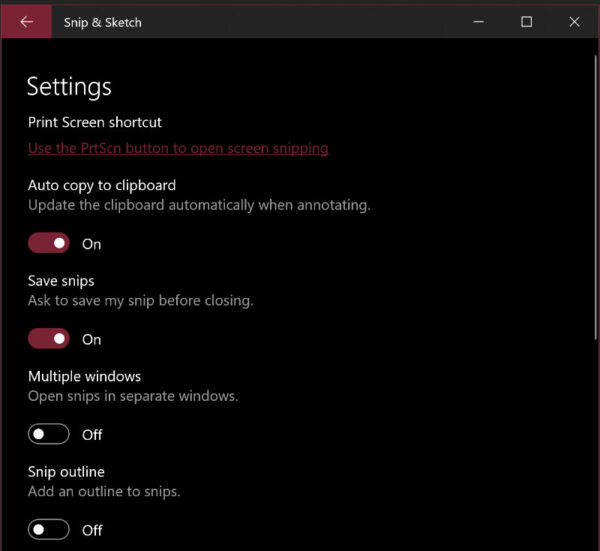
Before you create the screenshot, I would suggest you set the Snip and Sketch app to ask if you want to save the screenshot.
To change the save setting in Snip and Sketch, click the Windows Start button and scroll through the list of apps until you find Snip and Sketch. Open it just as you would any other app.
- Click the three horizontal dots in the upper right corner of the Snip and Sketch window.
- Click Settings
- Turn Save Snips on.
- Turn on Auto Copy to Clipboard (this is not required, but I suggest you do it so the screenshot is automatically saved to the clipboard. That allows you to paste the screenshot into any app that allows image files.)
With your Word file open,
- Click Shift + Windows key + S at the same time. A control bar for the Snip and Sketch tool should open at the top of the screen.
- Click the left button on the bar.

- Your mouse pointer should change to a crosshairs.
- Click in the top left corner of the page and drag to the lower right corner.
- When the entire page has a border around it, release the mouse button.
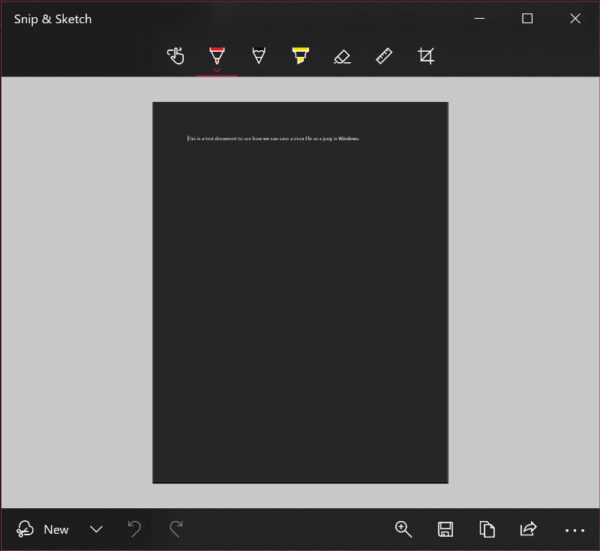
A notification should pop up in the lower right corner of the screen asking you if you want to save your screenshot. You should say yes.
When you look at the screenshot, you should see a photo of your Word file. You can save a copy of the screenshot by clicking the floppy disc/save icon at the bottom of the Snip and Sketch panel.
Get a JPEG copy of your MS Word file on Windows using a PDF
If you don’t know how to create a PDF of your Microsoft Word files on Windows, I suggest you take a look at our article Word Doc to PDF – A Quick Tutorial.
If you are familiar with photo manipulation software such as Affinity Photo, Gimp, or Photoshop, you can import the .PDF straight into the software.
With the PDF file closed, right-click on the file name. Click Open With… and choose a photo manipulation software if you have one installed.
With Gimp (a free app) and Affinity Photo (paid app, but inexpensive), the PDF will open in the app. Immediately go to the File menu and click Export to… and choose JPEG as the file type to export to.
The app will ask where you want to save your JPEG.
A detailed tutorial on how to import a PDF and export a JPEG using Gimp or Affinity Photo is beyond the scope of this article, but it really is simple and takes less than five minutes to accomplish.
Use an online converter.
I rarely use online conversion services myself, primarily because I prefer to keep complete control of my files. Having said that, if you’d prefer that option, you can upload the PDF that you created to a conversion service. They will then give you a file (often a .zip file) that contains separate JPEGs for each page of your Word document.
Adobe has such a PDF export service that you can subscribe to. You can also use Adobe Acrobat Pro DC to convert PDFs to image files. You can use it for seven days before having to continue with a paid subscription.
For other services, typing convert PDF to JPEG in any search engine will give you a long list of online conversion services.
