ProWritingAid for MS Word is the first choice of thousands of writers who need self-editing assistance. Many of those writers are Apple product users and want to use ProWritingAid’s Microsoft Word add-in.
Table of Contents
Until recently, because of limitations within the Mac version of Word, there was no direct add-in that allowed ProWritingAid to work directly inside MS Word.
That has changed. I’m a Mac user and a dedicated ProWritingAid user with a lifetime subscription. So I was glad to learn there is now an official ProWritingAid add-in available for Microsoft Word on Macs.
I opened the Insert tab in Word, and clicked the Get Add-ins button. A simple search in the Add-ins panel brought up the ProWritingAid add-in. I installed it and ran some tests with it.
How to install ProWritingAid for Microsoft Word on Macs
The Windows version of the add-in can be downloaded from ProWritingAid.com and installed like any other app. But there is no download file for the Mac version. If you click the install button from ProWritingAid.com, you’ll just be taken to the Microsoft Office add-in store. That’s the same place you install it from if you do it within Word.
It’s probably fastest to install it directly through the Get Add-ins button in Word. To do that, either:
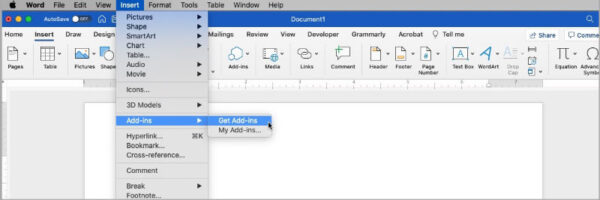
- Go to the Insert menu
- Click Add-ins
- Click Get Add-ins
OR
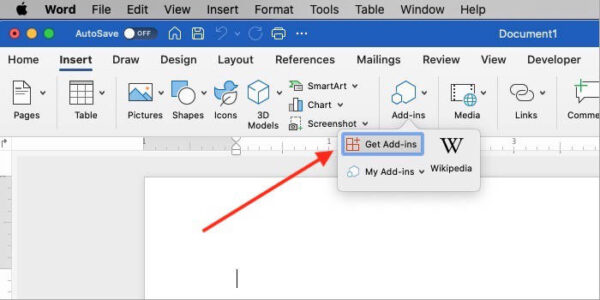
- Open the Insert Tab
- Click the Get Add-ins button
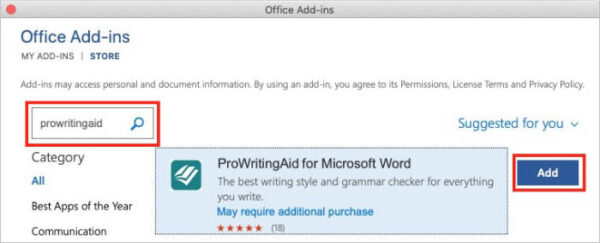
With the Get Add-ins panel open, Type ProWritingAid in the search box.
The ProWritingAid add-in will show in the results column. Click the Add button to install it.
The ProWritingAid add-ins for Microsoft Word require a premium subscription. You can get 20% off ProWritingAid subscriptions when you click here.
How to use the ProWritingAid add-in for Microsoft Word on Macs
NOTE: Most of the following will apply to ProWritingAid for Windows and Mac users.
Once you have installed the add-in, you’ll find it in the Home tab, probably all the way to the right. (That’s where it is when I open Word.) Click the large ProWritingAid button. You should see a document from ProWritingAid welcoming you.

Create a new Word document or open an existing one, then click the ProWritingAid button again. You’ll be required to log into your account. Use the same username and password that you use to log into your premium account at prowritingaid.com.
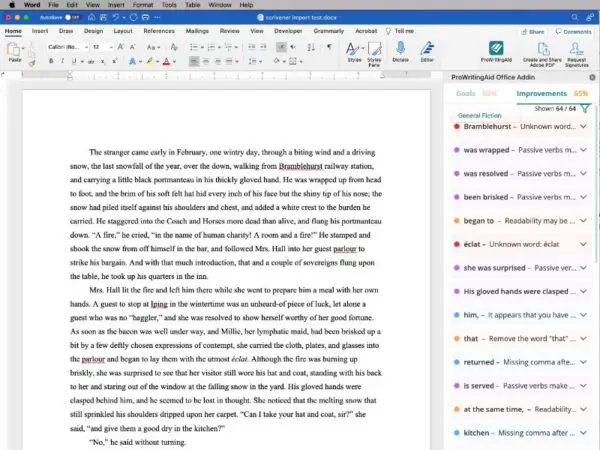
It may take a few seconds but if you have a document open that already contains text, ProWritingAid will display a list of grammar, style, passive voice, and spelling issues that it has found. If you don’t see the list of suggestions, check to see that the Improvements tab is open. If you only want to find grammar or any of the other three issues, open the Improvements tab and click the funnel icon just below the Improvements tab. You can check those you want to use and uncheck those you don’t.
You can skip around and check on any suggestion that you wish, but I’d suggest starting at the top of the list and working through them. When you click the arrow to the right of each suggestion, you can accept the suggested change, disable that rule, or ignore it. You’ll then move down to the next one in the list. To save any changes you made using the sidebar or to run any of the other available rules/tests, you’ll need to open the full editor.
Below the list of grammar and spelling suggestions there is a button labeled Open Full Editor.

You can click that button at any time to skip the list of suggestions and move on to the full editor or just wait until you work your way through the suggestions. In the full editor, you’ll see your document with different colors of underlines. If you mouse over one of those, the appropriate tab will open down the left side. Those tabs are the similar to those that were in the Word sidebar before you opened the full editor.
To the right of the Open Full Editor button there is a gear icon that leads to a small settings panel. For the best results I suggest you click that settings button/icon. That’s where you set your language and your writing style.
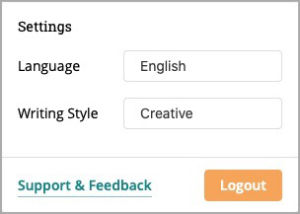
The available languages are:
- English
- English US
- English UK
- English AU
- English CA
The available writing styles are the same that are available in the online version or the desktop apps.
- General
- Academic
- Business
- Technical
- Creative
- Casual
- Web
- Script
If you choose the style that is most appropriate for your writing task, you get the best results. If you write fiction today, you’d want to select Creative. If tomorrow you’ll be writing a blog post, you might want to select Web.

With the full editor open, you’ll see more settings centered in the green bar at the top. The first is Language. The choices there are the same as you found at the bottom of the sidebar.
The second settings item Writing Style. The choices there are also the same as those at the bottom of the sidebar.
The third settings item is Document Type. That setting is not available at the bottom of the sidebar. If you open the Document Type setting, you’ll see a long list that is divided based on the choices that were available under Writing Style. For example, if you chose Creative as your writing style, you could choose from fantasy, historical fiction, romance, horror, or several others.
Choosing the right combination of Writing Style and Document Type should theoretically help ProWritingAid present you with more accurate advise.
The fourth settings item is App Settings. Most of those are self-explanatory. One exception might be the Combo Reports section. You may have seen Combo as a report choice at the top of the full editor. The Combo report button is basically a short-cut that will combine your choice of reports into one. This can save time. But it can also make it difficult to see exactly what each mark in your document indicates if your Combo report includes too many reports.
That’s why the Combo reports section is in the App Settings page. You can check beside the exact reports you’d like to see in the Combo report. If you want the option to quickly run a report on grammar, structure, and dialog, you can check those three reports to be included in the Combo report. Then, when you’re ready to run the reports, just click the Combo button to get a combination report covering just those three items.
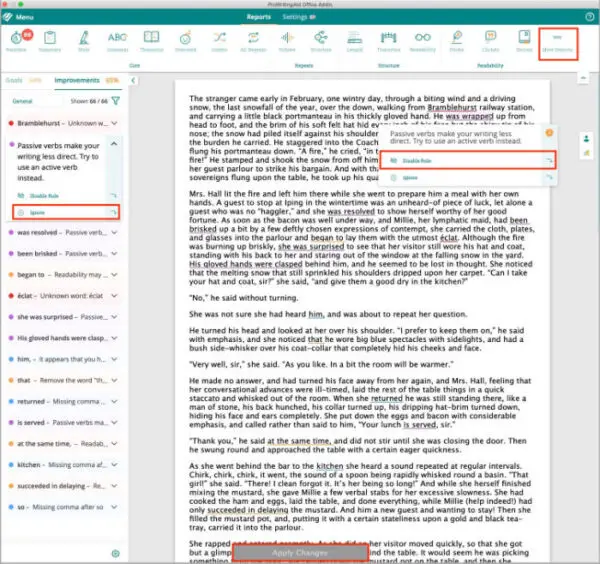
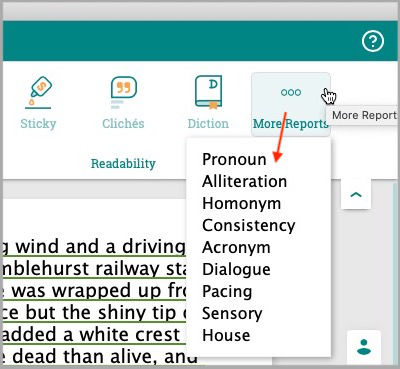
There are more than twenty tests that you can run on your writing. There isn’t enough room in this article to go into all of them individually, but you will see them across the top of the full editor. When I opened the full editor, it opened in a smaller size than full screen. When that happens, only a partial set of the possible reports is visible. There is a small three-dot icon near the top right corner. If you click that icon, you’ll be able to choose others from a list that drops down.
Make the changes that ProWritingAid suggests or ignore them. Then, when you’ve finished, click the gray Apply Changes at the bottom of the editor.
You can drag the sides of the editor windows out to enlarge it as far as you wish, or you can double-click the top bar to expand it all the way. Doing so will show all the reports that are available unless your computer has a fairly low resolution screen. In that case, you may need to use the three-dot menu to select more reports.
The reports you see in the full editor are the same reports you see in the online version of ProWritingAid.
Like the next two options we’re going to look at, you would probably have a better experience with ProWritingAid in Word if you don’t try to run a full book manuscript through it in one pass. If it’s possible, I’d suggest possibly dividing your document into separate files that don’t exceed 10,000 words each. ProWritingAid recommends not trying to run longer documents than that in one pass. It is possible to do, but as I’ll explain later, it could greatly slow the process.
How to use the ProWritingAid desktop app on Macs
There are two other ways that you can use ProWritingAid with MS Word for Mac.
The first option involves downloading and installing ProWritingAid’s app for Mac. You can find it here (with a 20% discount if you use this link).
- Download and install ProWritingAid for Mac.
- Once installed, open the app.
- Open your MS Word document in MS Word.
- You can copy and paste your entire MS Word document into the ProWritingAid app. However, I would strongly suggest that you break up your file and only run a section at a time through ProWritingAid.
If your document is a book manuscript, try copying one chapter and paste it into ProWritingAid. Run whichever reports you wish to check your work for, make the edits and corrections you need to make, then paste the chapter back into your MS Word file. Just repeat the process until you’ve checked everything you wanted to check.

Can I run long book files through ProWritingAid?
You can paste your entire book manuscript into ProWritingAid at one time, but unless you have a very powerful Mac and a very good internet connection, you’ll probably find that trying to run such a large document in one pass will greatly slow the process. No matter how you use ProWritingAid, it must have an internet connection to function. It does a massive amount of work behind the scenes.
Running one chapter at a time and a few reports at once is a much faster way to do it.
You would normally not need to run every report at one time, or even use them all on a given piece of writing, but ProWritingAid can run approximately two dozen different reports. Doing that much transfer and document analyzing requires time and system resources on both ends. I’ve found that running one chapter at a time and a few reports at once is a much faster way to do it.
If you are going to use ProWritingAid for Mac to edit your Ms Word file and you expect to run several different reports on your document, I’d strongly recommend breaking it up as I described before.
Using ProWritingAid to edit your Word file online
There is another way to use ProWritingAid with MS Word. The method I’m about to explain is the one I used as I was working on my latest novel.
For this method, you’ll be uploading your MS Word file directly to ProWritingAid online. Note that the free version only allows about 500 words which you would paste into the document checker. In this article we’re talking about a long-form document, such as a book manuscript. You’ll have a much better experience with a paid subscription. That will allow you to upload your entire document into ProWritingAid, run the reports and make your changes, then export it back to your computer.
Log into your ProWritingAid account. Once you’ve logged in, you will see your user name in bold letters in the top right corner of ProWritingAid.com. Click your username. That will take you to your work area. In the center, you’ll see an orange icon which prompts you to create a document.
For this project, you won’t create a document. (That is useful for those times when you just want to check a short piece of writing. Create a document and paste your written work into it. You can then run your desired reports. You would just copy the document contents and paste it back to your original document, or export the file. You can also write the piece right there in the editor window or upload a file into the window.)
For your long-form document:
- Mouse over the orange icon with the + in the center.
- A second icon will appear. Click the icon to open a dialog box where you can upload your MS Word file.
Once the file is uploaded, ProWritingAid will offer to divide your document into sections for easier editing. In the case of a fiction manuscript, those sections will most likely correspond to your chapters. ProWritingAid looks for headings in your file and uses those as markers to create new sections. You will end up with your file displayed along the left side of the screen with each chapter separated.
If the chapters that ProWritingAid found don’t correspond with yours, be sure that each of your chapter headings in your original MS Word file uses the same heading style. I used Heading 1 in Word and had no difficulty with ProWritingAid correctly detecting my chapters.
Once the file is imported and separated into your preferred chapters, you can then open each chapter and run whichever reports you need on that chapter. Be sure you go to the Menu in the bar at the top left and save your document after anything is changed.
I like to save after I’ve made the edits from each report before I move on to another report, but you could wait until you’d run all of your reports on the entire chapter. ProWritingAid will prompt you to save your file if you haven’t done so whenever you try to open another chapter.
When you’ve finished your edits and saved your file, you can easily export your file back to your computer using the same Menu icon in the top left.
One note about format changes in your Word file. After you upload your Word file into ProWritingAid, you may notice that some formatting is changed. That is normal. Go ahead and run your document through your chosen reports and save it. ProWritingAid strips some formatting from the version you see in the edit window, but attempts to maintain all of your original formatting in the file that you uploaded. I’ve found that it is pretty good about doing just that.
I did have one issue where I converted all quotes to curly quotes using the menu in ProWritingAid. I was careful to save the file every time I ran that command. Yet, when I exported the file back to my computer, I found that the curly quotes did not carry over. I promptly contacted tech support at ProWritingAid. They responded and told me they were looking into the issue.
(Note: ProwritingAid’s support team did correspond with me several times about this issue. They could not replicate the issue on their end. It seems to have resolved itself. I assume it was either a temporary glitch on their end, or a hiccup in the way MS Word for Mac opened it on my computer. I have tested files again and have found that the feature that converts all quotes to curly quotes is working as it should. I appreciate ProWritingAid’s support team working with me on it.)
In most cases, even if your formatting looks different in the ProWritingAid window, it will still be there when you export it back to your computer.
I’ve shown you three options for using ProWritingAid with Macs. Just choose the one that works best for you. Truthfully, I found it easy enough to work on the entire book manuscript by logging into my account online and making my corrections there. Next time I have a manuscript to check, I will use the newly available ProWritingAid add-in for Word on Macs.
As I mentioned earlier, you can get ProWritingAid with a 20% discount by using our link.
