There are two ways to manually add a synopsis to Scrivener documents. One allows you to dictate word for word what the synopsis will say. The other uses text from your document to auto-fill the synopsis. In this article we’ll see how to manually add a synopsis to a Scrivener document. Learn how to use the auto-fill method for Mac and Windows V3 here and for Windows V1 here. (Note: Since Literature & Latte released Scrivener V3 for Windows, most instructions for Mac also apply to Windows.)
Table of Contents
Manually add a synopsis to Scrivener documents
The only way to create a synopsis in Scrivener that is specifically worded is to type it in. You do that by opening the Synopsis tab along the top of the Inspector. A text box will open just below the tabs in which you can type your synopsis. Type your own description summarizing the scene or section.
The box where you type is called the Synopsis area, but in reality, you can use the synopsis area to write a reminder or any type of note that you want to be visible when you compare meta-data for your work in progress.
The synopsis, however it is written will not be visible in the finished work.
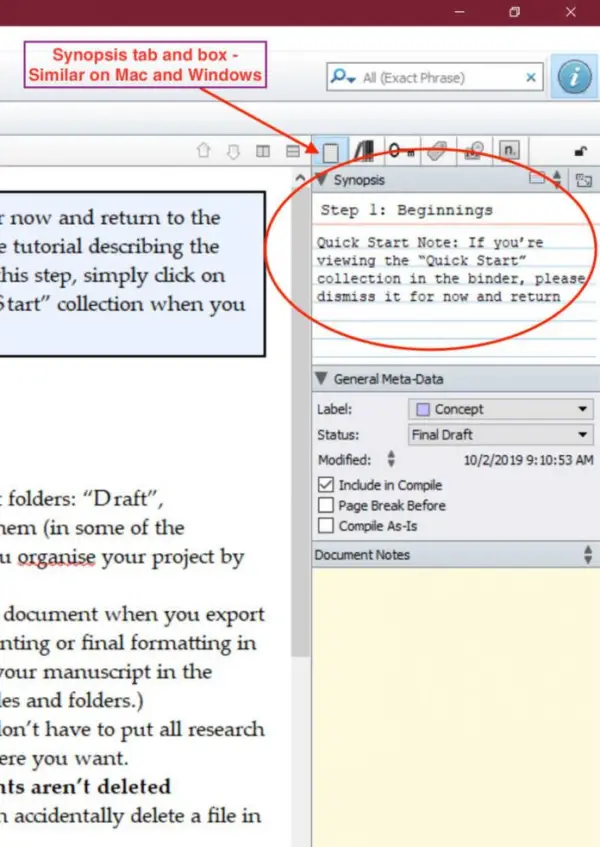
Scrivener for Mac and Windows synopsis box in Inspector
The methods to add a synopsis to Scrivener for Mac and Scrivener for Windows use almost identical. The appearance of the tabs and buttons is different, but in the same locations.
NOTE: The following instructions assume that you have your Scrivener project set up with folders that contain documents. Those documents could be full chapters, scenes, beats, or any other part of your work that you want to write in separate documents.
If you don’t see the synopsis box in Scrivener
If you don’t see the synopsis box in the Inspector, be sure you have a folder or document open.
You must have a document or folder open to type a synopsis.
If you select just the folder that contains the document and type a synopsis in the box, that synopsis will apply only to the first document in the folder, no matter how many documents are in the folder. Opening the documents inside a folder allows you to type a different synopsis for each document.
Where the synopsis will be displayed in Scrivener
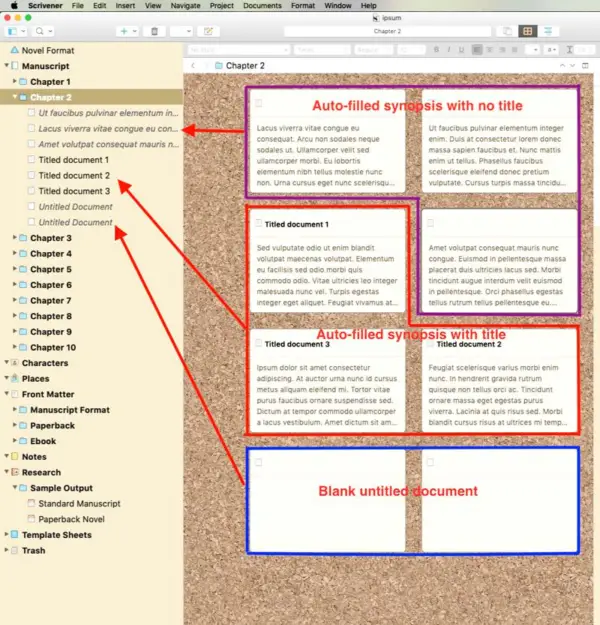
NOTE: The synopsis that you type in or allow Scrivener to auto-fill will also be displayed on the cards in the Corkboard view and in the Outliner view when synopsis is checked as one of the items to display in the Outliner. It will also be displayed in the Binder for those for those documents that have not been given a title.
A synopsis that you manually enter in the Inspector will override any auto-filled text in the Outliner and Corkboard. It will also override any text in the binder unless you have typed in a specific title for the document.
A note about this tutorial. All of our Scrivener tutorials are personally written based on our own experience with Scrivener. If you would enjoy more in-depth training, we recommend Joseph Michael’s Learn Scrivener Fast Course .
