To add rows and columns in Microsoft Excel is a simple task, but not always obvious or easy to find. Empty rows and columns can be added from the menu, the ribbon, right-click menus, and keyboard shortcuts. Here’s how to do it in Excel for Windows and Excel for Mac.
Table of Contents
Add a row in Excel for Windows
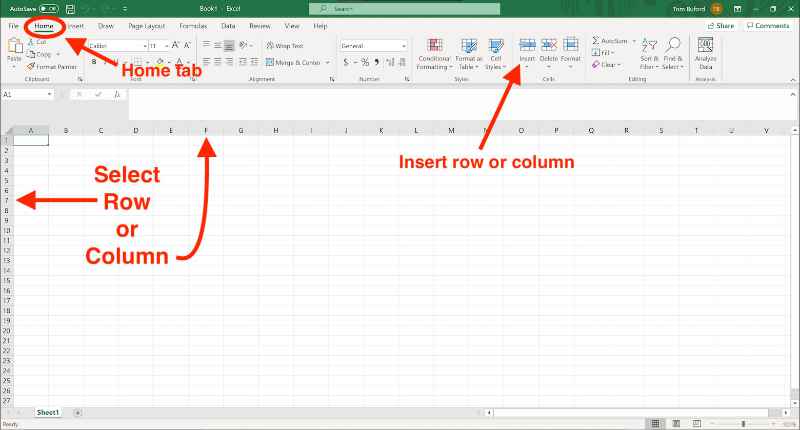
If you want to add one row, you will select one full row by clicking on the row number. Then do any of the following.
- Go to the Ribbon and select the Home tab. In the default setup you should find the Insert button in the fourth section in from the right. The Insert button is a multi-use button. If you have selected a row in the previous step, one row will be added above the selected one when you click the Insert button.
- Position your cursor over the column number along the far left edge of Excel. Be sure the cursor turns into an arrow pointing to the right. Double arrows will not work. Right-click on the selected row and choose Insert. A single row will be added above the one you selected.
- Hold down the Shift key, the Control key, plus the + key at the same time. A single row will be added just as in the previous methods.
It is important to understand that Excel will always add rows above the selected row, never below it.
Add a row in Excel for Macs
Just as with Excel for Windows, Excel for Macs will always add rows above the selected row, never below it.
If you want to add a single row, select one full row by clicking on the row number. Then use any of the following methods.
Go to the Ribbon and look for the Insert button in the fourth section in from the right under the Home tab. If you have selected a row in the previous step, when you click the Insert button one row will be added above the selected one.
Position your cursor over the column number along the far left edge of Excel until it turns into a right-pointing arrow. Right-click on the selected row and choose Insert. A single row will be added above the one you selected.
Hold down the Shift key, the Command key, plus the + key at the same time. A single row will be added as it was in the previous methods.

Excel for Mac give you also allows you to add rows by selecting the row as instructed above, then choosing Rows from the Insert menu at the top.
Add multiple rows in Excel for Windows and Macs
To add multiple rows in Excel for Windows and Excel for Macs, simply select the number of rows you wish to add. For example, if you wish to add seven rows to the top of your worksheet, select the top seven rows, then follow any of the methods outlined previously in this article. Clicking the Insert button will add seven rows above the seven that you selected.
Don’t worry about your data being deleted when you select the rows then add more. Adding rows will do just that, leaving your original rows fully intact.
Add columns in Excel for Windows and Macs
Adding columns in Excel works just like adding rows. The difference is that instead of selecting one or more rows along the left side of the worksheet before clicking Insert, you will select one or more columns from the alphabetized header row across the top.
Just as new rows are always added above the selected row or rows, columns are always added to the left of the selected column or columns.
If you select one column, then click Insert using any of the methods outlined above, one column will be added to the left of the selected one. If you select ten columns, then click Insert, ten new columns will be added to the left of the columns you selected.
If row or column is greyed out in Excel and can’t be selected.
If you use any of the methods above to insert a row and you see that Row is greyed out but Column is active, that means you have selected a column instead of a row. If Column is greyed out, but Row is active, you will find that you have a row selected instead of a column.
You must select one or more rows if you want to add rows. You must select one or more columns if you wish to add columns.
You may find that you need to merge or combine cells after you insert additional rows or columns in Excel.
Insert or delete rows and columns in the Web version of Microsoft Excel.
